
Some people consider the roll center kit (RCK) a must for lowered Subarus. It corrects the suspension geometry of a lowered car and brings the roll center closer to the center of gravity. And while there used to be multiple companies offering RCKs for Subarus, the list has more or less whittled down to two Australian based companies – Whiteline and SuperPro.
I have had issues with Whiteline products in the past, so my personal preference between the two is SuperPro. That said, I didn’t have any issues with my Whiteline RCK on my old 2005 STi.
Unboxing
The SuperPro Roll Center Kit comes in a nice box.

However, the internal packaging could be better. This is exactly how parts were arranged when I opened the box. And after cruising the comments section of Rally Sport Direct (RSD) and this seems to be a common issue.

Luckily, nothing was damaged and I don’t think the parts could move around too much in this current position. Which was good as the box comes with everything you need to install the kit.
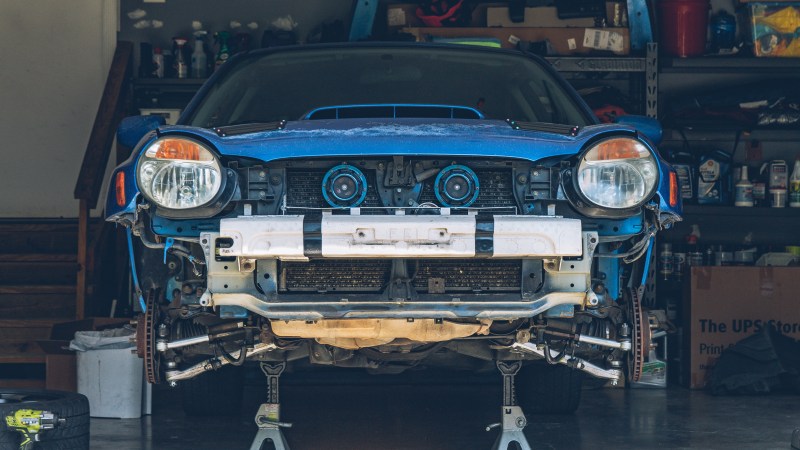
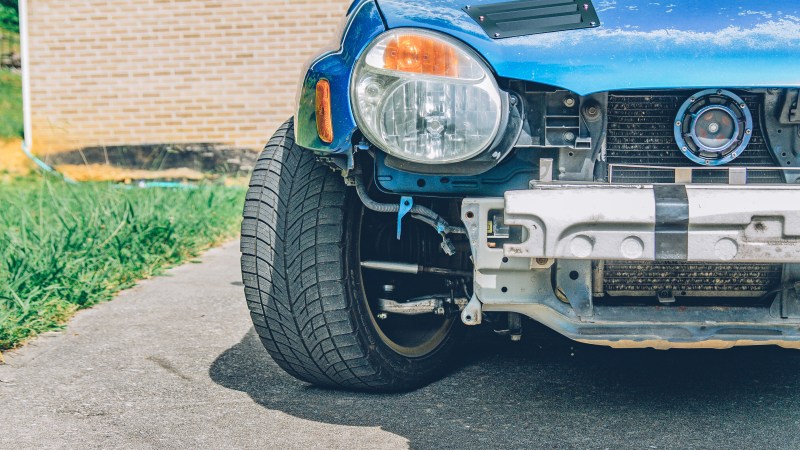
This step isn’t necessary but to get a better look at the stock suspension I removed the front bumper. And if you are planning to do your own alignment, it is a lot easier to reach the tie rods with the car on the ground with the front bumper removed.

Also, we can remove the undertray and the fender liners and put the car back on the ground.

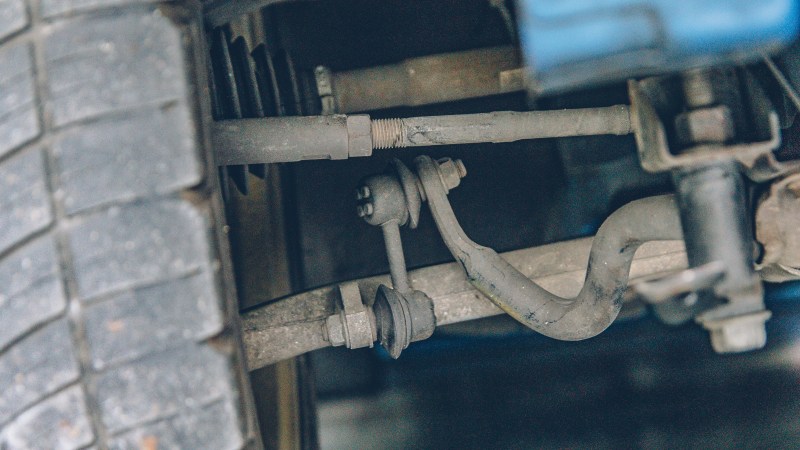
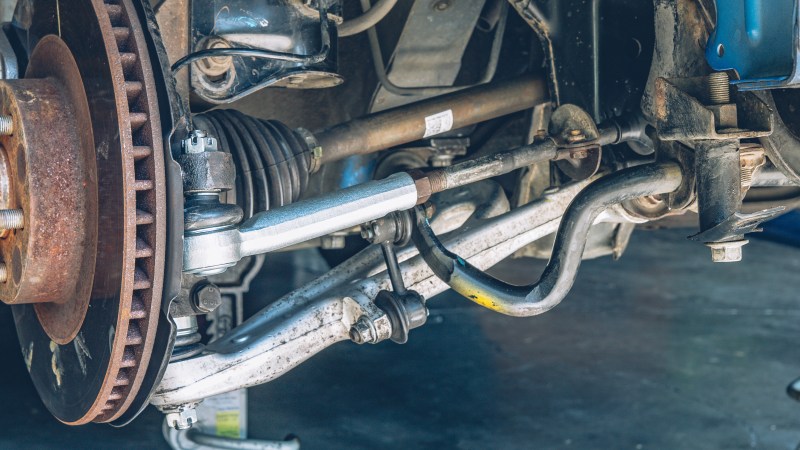
Now we can get a better look at the control arms and tie rod ends.
The control arm angles look fine to me as I was expecting a lot worse. As a general rule of thumb, the lower control arms should be about parallel to the ground. The tie rods do seem to have a high upward angle to them but I don’t know what the OEM geometry looks like.

Disassembly

First up, we need to remove the cotter pins from the tie rod end and the ball joint castle nuts. Since the SuperPro kit comes with new cotter pins, you don’t need to be nice to these pins. Sometimes they come out nicely, sometimes they break.

When I am working on suspension hardware that I haven’t touched before, I like to make sure that I can break all of the nuts and bolts loose. Nothing is worse than getting down to the last bolt and having to put the car back together because it won’t break loose.
Next, we can back off the lock nut on the tie rod end. Since the new tie rod ends are longer, we can’t just mark the current locations and transfer those over to the new ends. However, you can hold the new tie rod ends up next to the current tie rods and either count how many threads are still exposed; or measure the distance of the exposed threads.

And now back off or remove the castle nut on the tie rod end.
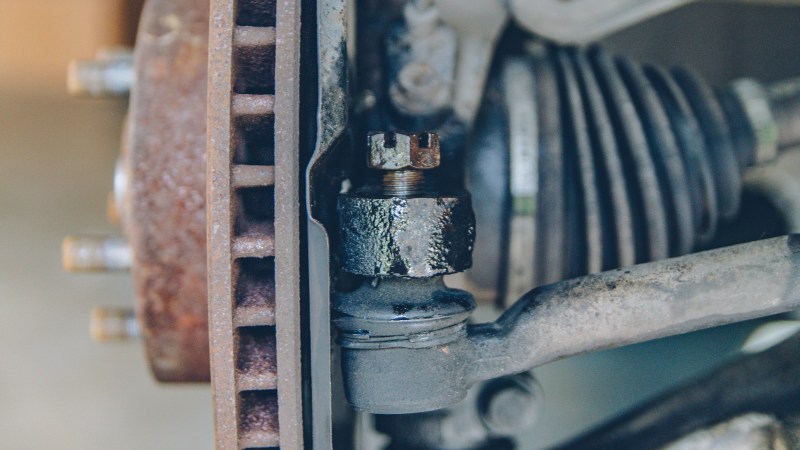
Grab your BFH and hit the knuckle until the tie rod pops loose. I like to leave the nut on to keep the tie rod from banging me in the shins.
Also, my success with the BFH method has been hit or miss. Since we are replacing the tie rods anyways we don’t need to be too nice to them. You can either whack the top of the tie rod end or use a suspension fork. If you use a BFH on top of the tie rod just make sure you don’t mushroom the threads and prevent it from passing through the knuckle.
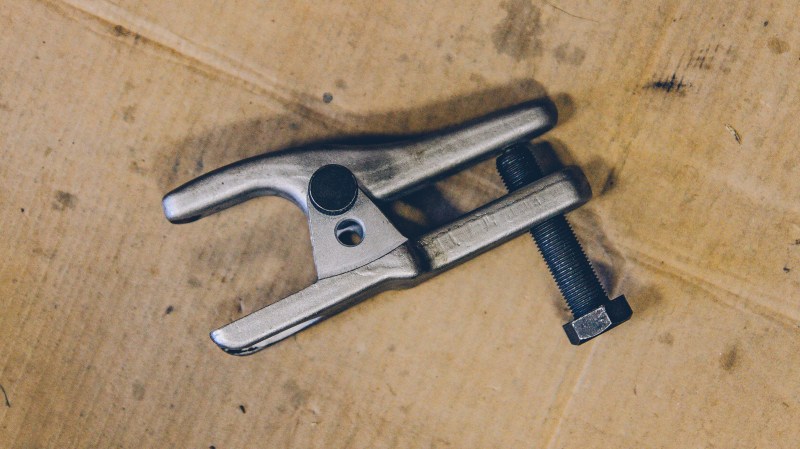
There is a handy tool that will press the tie rod end out of its home as well.
Once the tie rod end is free from the knuckle, we can unscrew it from the inner tie rod.

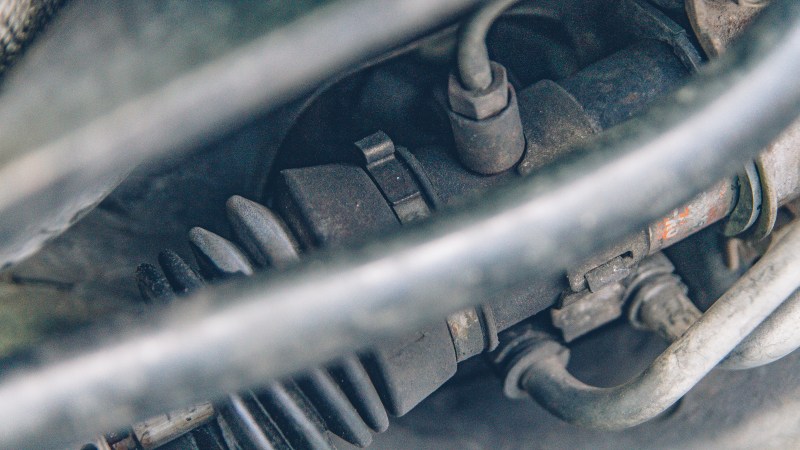
Since I am replacing my torn steering rack boots I need to remove this item as well. I have no idea what it is or what it is called or what it does but it is in the way of removing the steering rack boots.

Next, we can prepare to remove the ball joints. Remove or loosen the castle nut if you haven’t already and remove the pinch bolt from the knuckle.
The easiest way to remove the ball joint from the knuckle is to tap a pry bar into the split in the knuckle, spray it down with penetrating oil and tap the control arm with a rubber mallet.

If the control arm pops loose from the ball joint then reattach the control arm and loosely thread the castle nut back on.

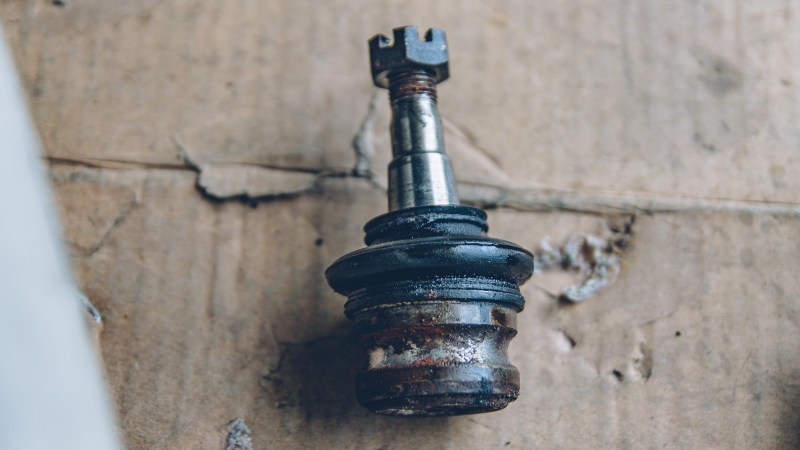
STi control arms use a cone on the ball joint (Subaru calls it a Boss Traverse Link), so remember to remove those from the old ball joints with penetrating oil and a little leverage from a pry bar or flathead screwdriver.


With the old ball joint out, we can clean up inner tie rod threads, mounting surfaces and etc to prepare for the installation of the SuperPro Roll Center Kit.
However, this is also a great opportunity to replace the torn steering rack boots so we are going to do just that.
Each boot is secured with a spring clamp and band clamp. The spring clamp can be removed with pliers…

And a flathead screwdriver will help loosen the band clamp so the rest of the boot can be removed.

At this point, our steering system is fully disassembled and after some cleaning; ready for reassembly.

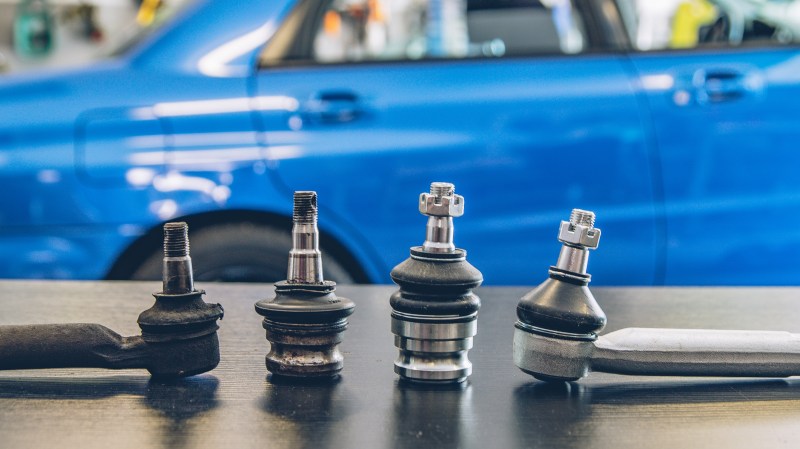
When we compare the OEM pieces to the SuperPro units, the later units are slightly taller to introduce the roll center geometry correction.
Installation
For the installation of the ball joint, we can apply some anti-seize to help prevent it from sticking to the knuckle.

I also found that it is easier to install the taller SuperPro ball joint by loosening the control arm bolts so you can drop the control arm down; then using a jack to lift the control arm back up.
The ball joint should only take a couple of light taps to fully seat it into the knuckle. If not, double check the surfaces in the knuckle to see if they are clean. Or use the pry bar in the knuckle to gain some additional clearance.

Reinstall the pinch bolt and castle nut secure the ball joint in place.

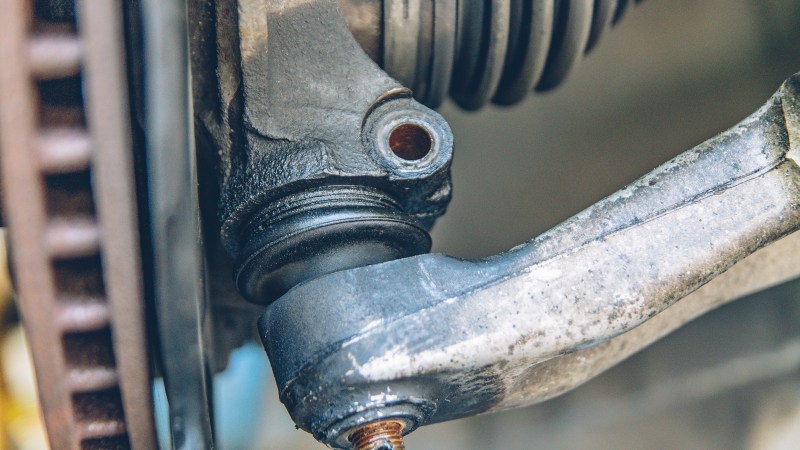
Before installing the tie rod end, if you need to replace your steering rack boots, now would be a good time to do that.
For the tie rod ends, you can eyeball how straight the knuckle is to get it close or use the number of threads counted before disassembly. In the next section, we are going to do a DIY alignment that should get us pretty close.
Insert the tie rod into the knuckle and tighten the castle nut down to gutentight specs, leaving a opening for the cotter pin to pass through.
If you are going to do the DIY alignment, then leave the lock nut loose. If you are going to take your car immediately to a professional, and I don’t blame you, then go ahead and tighten the lock nut down.
Reinstall the swaybar links and cotter pins.
We dun!

Almost, we still need to align this thing.
Alignment
I intended to include a section about a DIY alignment in this post; however, this post is getting very close to being 2000-words long and I haven’t even started the review section yet. I think the alignment post should probably be its own post and not buried in an install post.
So I will link to it when it is available.
Review
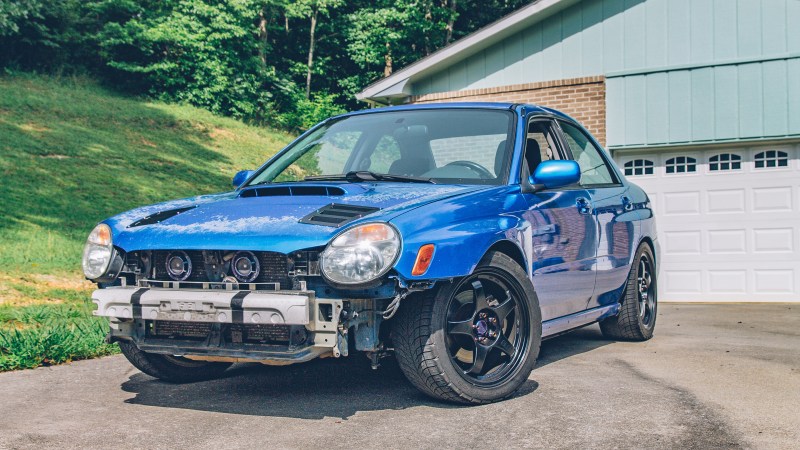
After finishing the alignment, I went for a quick test drive. I immediately noticed that the steering felt heavier than before. I’m not sure if that is from my alignment, I pulled as much negative camber out as the bolts would allow, or the roll center kit itself.

During normal driving, on center steering did seem a bit more direct. The car seemed to respond a little bit quicker to steering inputs.
At spirited driving speeds, however, especially in tight turns, is where I noticed most of the improvements. The car rolls significantly less up front as though we just added a larger swaybar. Somewhere after initial turn-in I’ve noticed that the steering gets very sharp; which could be my camber worn tires.
One of the downsides of the roll center kit is that the rear suspension clearly does not have it’s suspension geometry changed. So it basically feels like I put a big ole swaybar up front and left the rear alone. The rear still rolls a bit and some cases, oversteers.
I’m not sure what I am going to do about the rear situation just yet. The easiest thing (or most practical option) would be to add a larger rear sway bar and call it a day. I think I am going to explore rear suspension geometry correction solutions; the only options I believe are aftermarket knuckles (Wisefab) aftermarket rear subframes (TSSFab or MSI).

As funds allow, I think I will probably start with bracing in the rear like the Cusco Rear Lower Subframe Brace or an X-Brace. The Cusco brace is fairly cheap and I have used one before. It basically feels like an upgraded sway bar in the rear so that may be the first upgrade for the rear suspension.
However, right now, I need tires. The car is tramlining something fierce on these camber worn tires.
Cheers!
