After selling off my JDM fog lights I needed something to fill the voids. Either legit OEM fog covers, some sort of brake duct cover, or replica covers from HT Autos. I decided to go with covers from HT Autos because eBay was low on inventory on JDM covers and I didn’t realize I could still get new ones from Subaru. Plus my front end isn’t in the best of shape to begin with. I ordered them from FastWRX along with a can of Grimmspeed WRB paint. I was definitely interested to see how well the GS paint turns out.
Everything arrived fairly quick from FastWRX. I should of installed the covers first to see how they mounted but I was more interested in painting them. So I ran to the store to grab a red 3M pad and a can of primer. I had a little bit of clear coat leftover from painting my wheels – one of numerous times.
Overall the HT Autos covers seem pretty good quality. My only complaint is the bracket, but I kinda new that going in.
First step is to scuff up the covers to prep them for primer. I sprayed the covers down with water and rubbed them down with the red 3M scuff pads. 
I didn’t go too crazy just to lightly scuff them up as you can see below. Then I wiped them down with a microfiber cloth and a bit of rubbing alcohol. 
Once they were dry I hit them with a light coat of primer. I placed the covers on pieces of 2×4 to elevate the edges off of the surface to prevent them from sticking to the plastic.
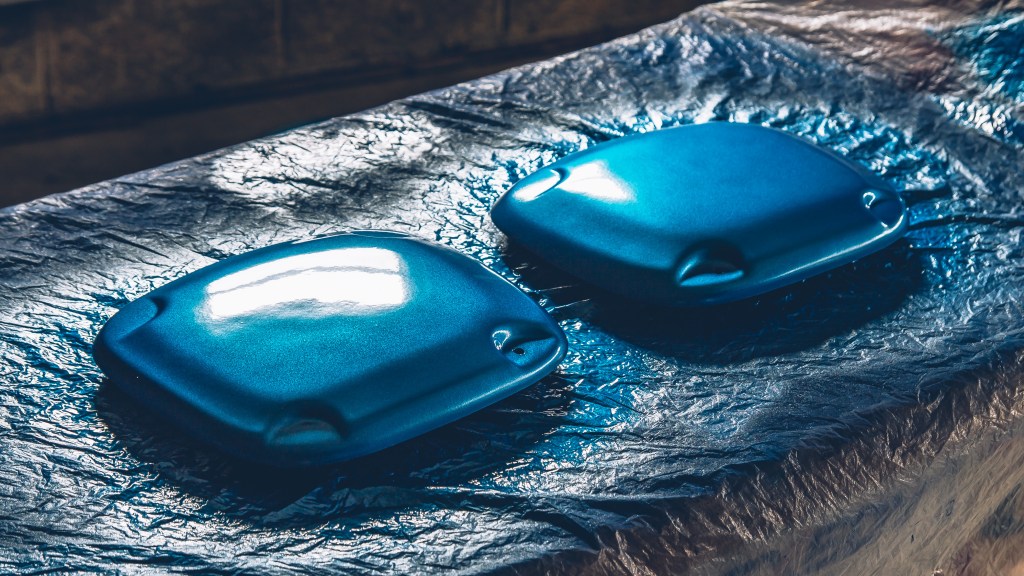
After the primer dried I began with light coats of Grimmspeed WRB. I stuck the can in a bucket of hot water prior to spraying. This seems to make it easier to mix and help with getting a consistent output on each pass. 
After the second coat I was pretty confident that these covers were going to turn out pretty good. Maybe too good considering the condition of the paint on my WRX. 🙂
I don’t recall how many coats I made, but I used up most of the can. As per instructions I waited a day before applying the clear coat. 
And the following day I applied 2-3 coats of clear before letting sit for another 24hrs. I personally think they came out great. Much better than expected. Should I need another part painted I won’t hesitate to grab another can of GS WRB. 
I am not sure if I am going to put the decals on. I may go with something custom instead.
I got ready to install the covers but I didn’t like the mounting situation. The L-bracket uses a couple of self tapping screws and I’m not even sure if it was big enough to work. 
So I ordered some OEM brackets to finish the install. Here are the PN# in case you need them.
Part Numbers:
57707FE250 – BRACKET COVER-FOG LIGHT,LEFT
57707FE240 – BRACKET COVER-FOG LIGHT,RIGHT
904680003 – SCREW
In the meantime I should have my Oswald Lightweight Front Bumper Beam soon! Stay tuned for an install and review of that.
UPDATE (3/19/2017):
I grew impatient after realizing that my bumper probably isn’t worth the effort I was putting into these covers so I attempted to install them with the HT Autos brackets. The bracket could be better, they basically mount on the edge of the fog light surrounds. A right angle drill would be handy in this situation. Nevertheless, I got them installed with the supplied hardware. I would recommend the OEM hardware if you don’t want to drill into your bumper.


Cheers!
Shopping List

Leave a comment