
So this post may be a little confusing. But it more or less a copy/paste job of my old 2009 WRX build thread before the forum was shut down. I wanted to keep the info out on the interwebs for future reference. Some links are broken and at some point I will go through and patch things up.
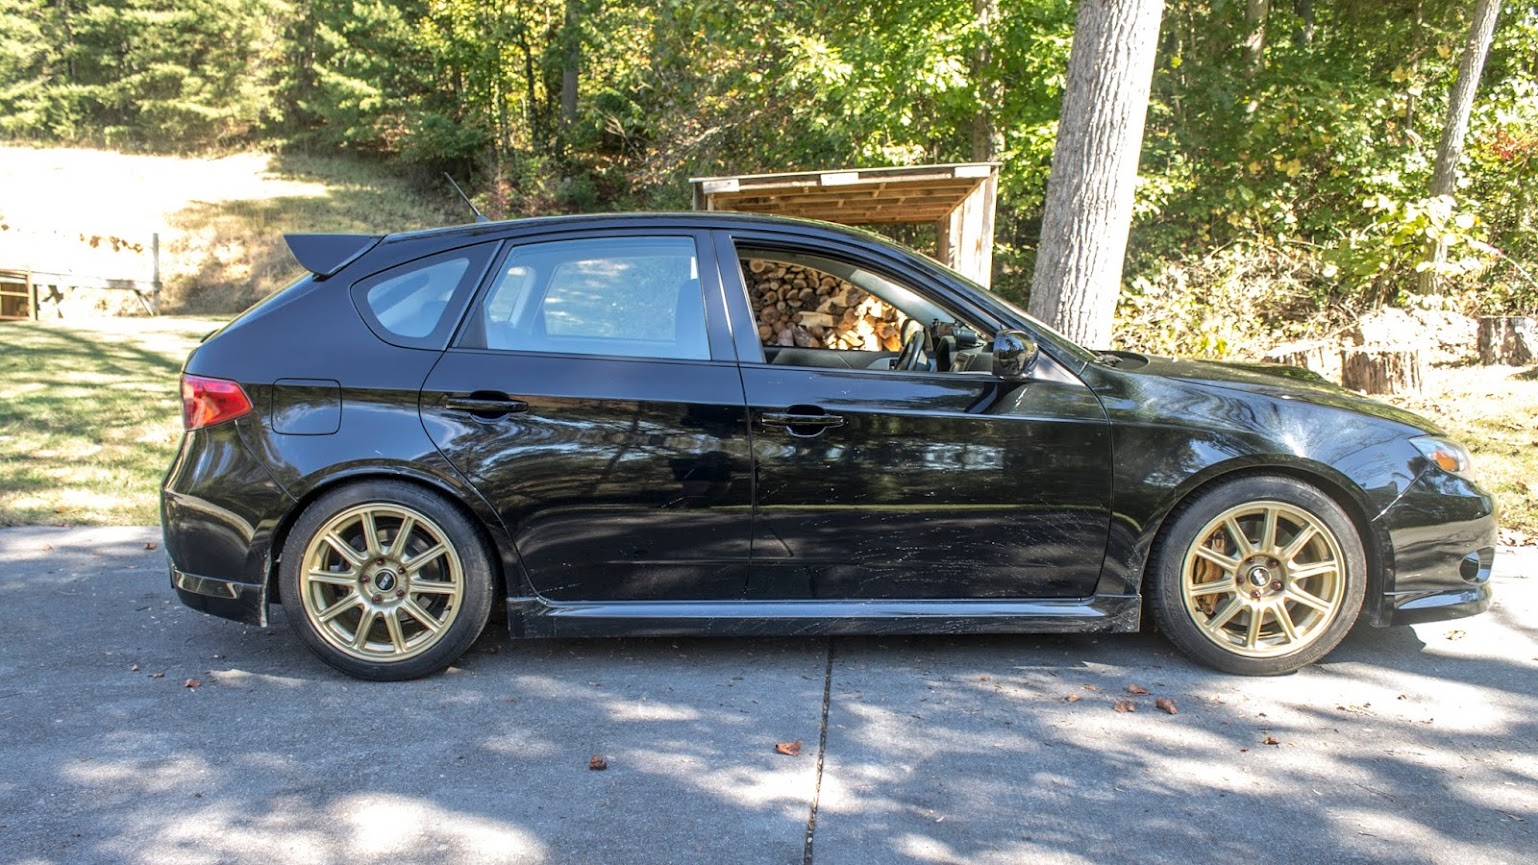
Current Pic
Image resized to 99% of its original size [801 x 801]

I bought my car brand new in the summer of 2009 at Glassman Subaru in Southfield, MI. This is my first new car purchase out of 13 previous automobiles, not counting the regrettable leasing of a 2007 V6 Mustang. After owning a 2003 Audi A4 Avant that was a nice car that tried to murder me via boredom, I knew what I wanted in my next purchase.
1 – It had to have a manual transmission.
2 – It had be a V8 or Forced Induction 4/6.
3 – It had to be a wagon/hatch.
4 – It had to have an aftermarket.
5 – It had to be domestic.
6 – It had to be RWD or AWD.
Alright so 5 out of 6 ain’t bad. ![]()
So after putting every car manufacturer on the table, it really came down to getting a used 2003/2004 Cobra or a 2009 WRX. All terminators in the Motor City were modded to hell and I didn’t want to go down that route. So we drove down to the Subaru dealer, went on a test drive and bought it on the spot.
Here’s what she looked like the day after I took her home.
Image resized to 78% of its original size [1016 x 762]

One of the first mods I did was install a Mode SS and Cobb Shift Knob. Hated the Cobb knob so I went back to stock.

One of my first appearance mods I did was cut out that center post behind the grill. I practically cried the whole time too. ![]() My car had maybe a couple thousand miles on it and I was putting a hacksaw to it already. As soon as I was done I threw the evidence away and ran inside the house. lol.
My car had maybe a couple thousand miles on it and I was putting a hacksaw to it already. As soon as I was done I threw the evidence away and ran inside the house. lol.
My only engine mods were a Stage 1 tune and a K&N filter. I did have a TurboXS CBE, but it droned like mad on the highway and fit like shit so I sold it and picked up a used SPT CBE. And the engine pretty much stayed near stock until we moved to Knoxville. ![]()
I could not stand how much the drivetrain moved under throttle. Under WOT, the shifter would move out of my hand! So I installed Group-N transmission, pitch and engine mounts. The Group-N pitch was almost like stock so I went with the Agency Power pitch. That cleaned things up nicely. I finished it off with a set of Perrin solid diff inserts.
My favorite pic taken by someone at C&C. Found it on the EAG Blog.

Pic at the dragon.

List of Mods.
Engine
- FMS TMIC
- Perrin 2 Piece Catted Downpipe
- Invidia N1 Street CBE Exhaust
- PTP Turbo Blanket
- MAC Boost Controller
- TP Stage 3 Tune
- DW 65C Fuel Pump
- Modded Stock Air Box
- K&N Panel Filter
- Grimmspeed Lightweight Crank Pulley
- Group N Engine Mounts
- Agency Power Pitch Mount
Suspension/Chassis
- ISC Coilovers [8k/6K]
- 2006 STi Front Calipers
- Centric High Carbon STi Front Rotors
- Centric Posi-Quiet Ceramic STi Front Pads
- GTSpec Fender Braces
- GTSpec Swaybar Braces
- SPT H-Brace
- Eibach Swaybars
- Rallitek Endlinks
- Whiteline Subframe Bushings
- 2008 STi 5-Spoke Wheels
Drivetrain
(more to come)
Exterior
(more to come)
Wishlist
- OBX Front Hellical Differential
- Cusco Rear Clutch LSD (1.5 Way)
- Moore Blast Plates
- LGT Spec B Front Control Arms
- Tomei Poncams
- Composite TGV Deletes
- Air Pump Delete
- Racer X FMIC
Been taking pictars of my car too!
Image resized to 78% of its original size [1016 x 352]

Image resized to 78% of its original size [1016 x 677]

Image resized to 78% of its original size [1016 x 670]

My rumble killer is here.
Image resized to 78% of its original size [1016 x 572]
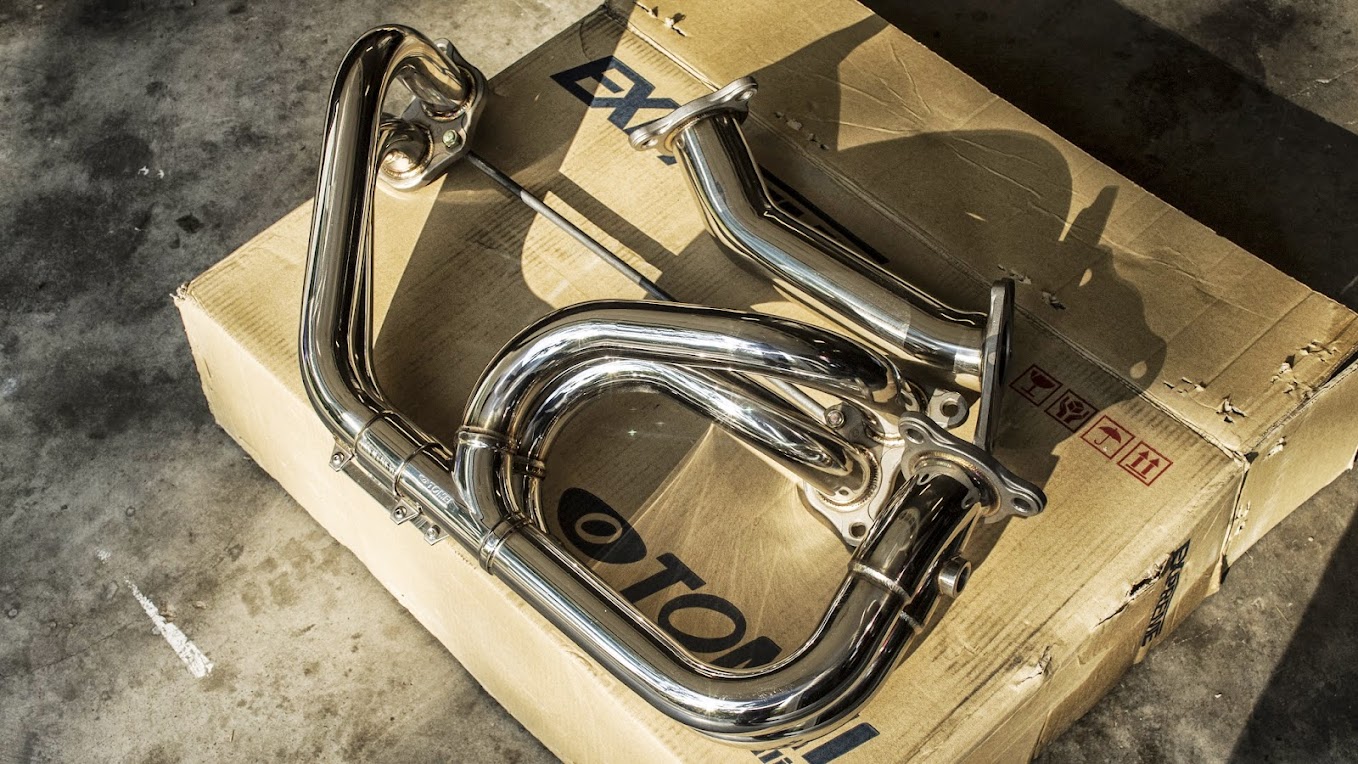
Image resized to 78% of its original size [1016 x 572]
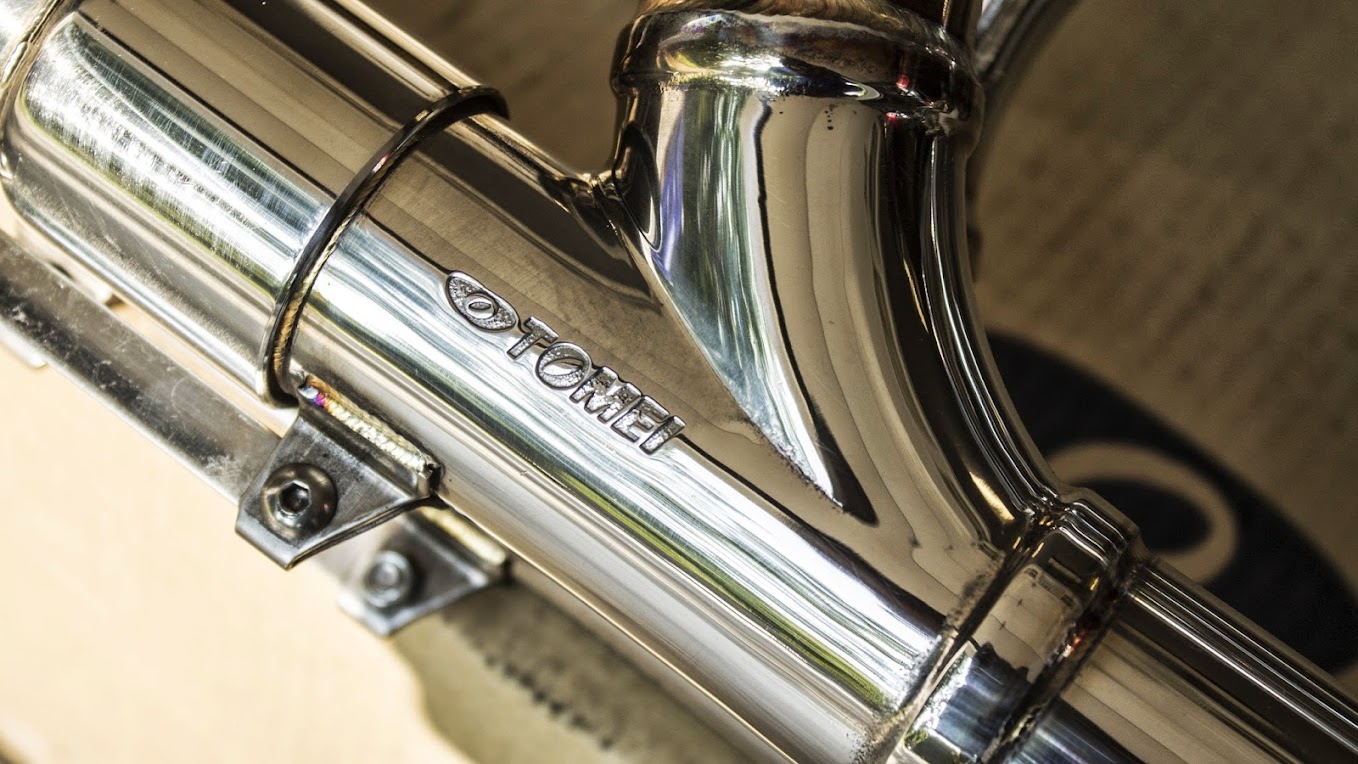
Image resized to 78% of its original size [1016 x 572]
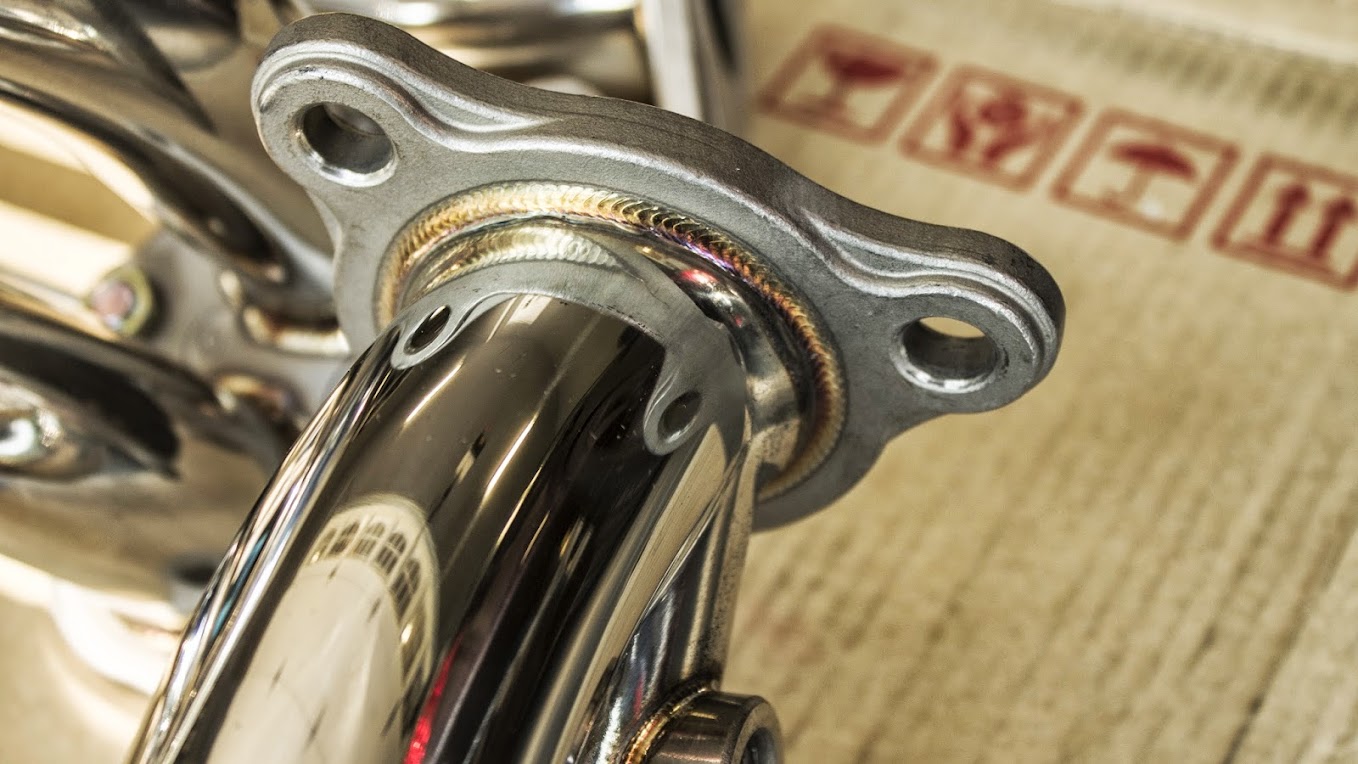
Image resized to 78% of its original size [1016 x 572]

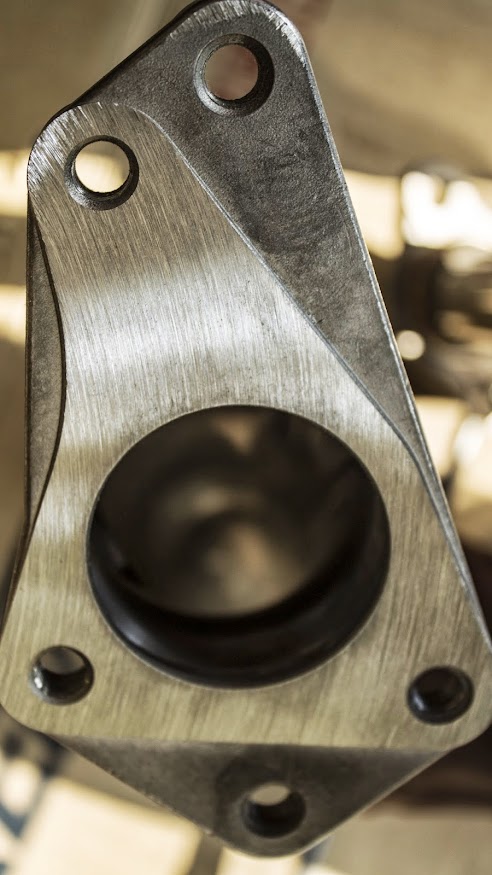
Image resized to 78% of its original size [1016 x 572]

Image resized to 78% of its original size [1016 x 572]
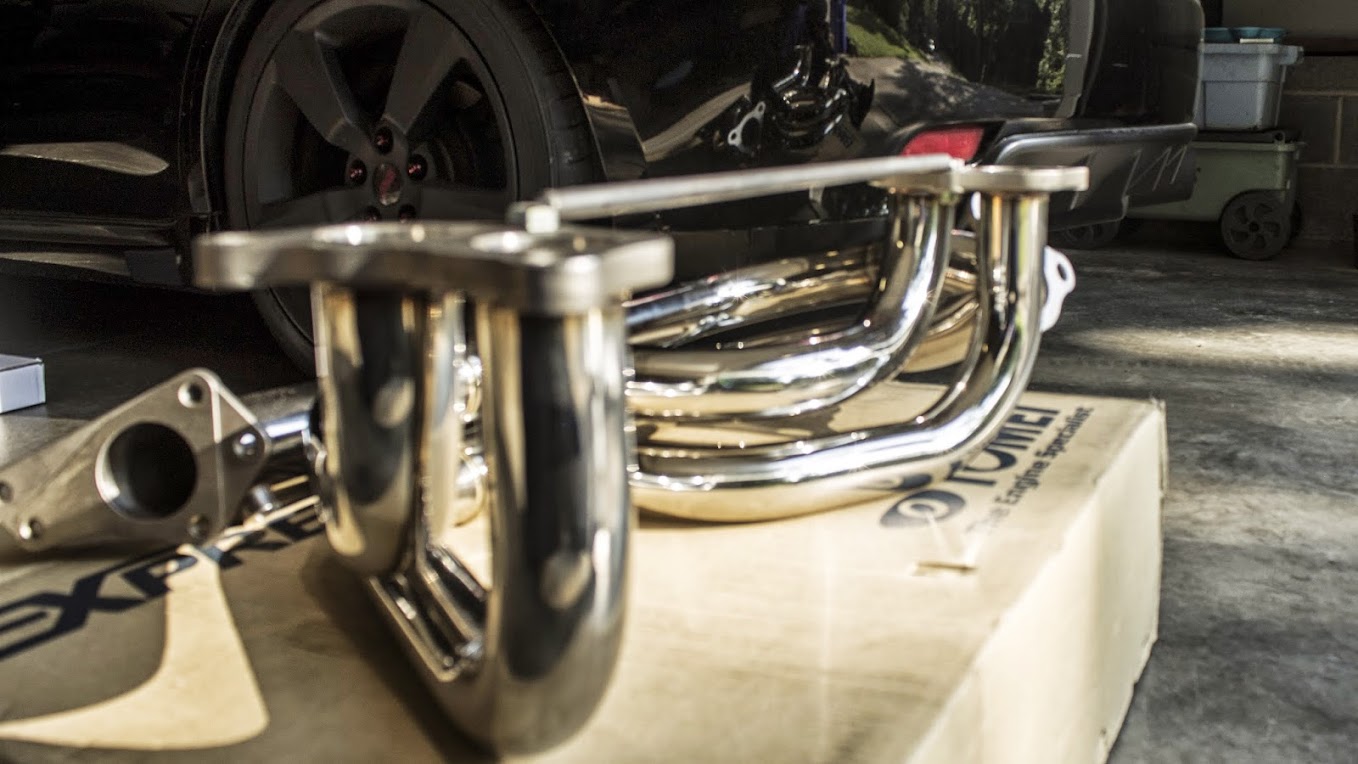
I am very happy with the quality of these headers. Perrin’s look terrible by comparison and cost more. They seem to be on par with Invidia and is a few hundred cheaper. The proprietary up-pipe was a bit of a put off, but the other options (quality, cost, sound, wrap) made this an easier choice.
I should have them installed tomorrow. Can’t wait to hear that new N1 sound. ![]()
Got them installed. Thanks for the help Russell! It rumbles slightly at idle. Under throttle it is completely different.
We wrapped them. I need to take about three showers. That wrap itches like a mofo!!!
I’ll take pics after I check the bolts again. And figure out how to keep my intercooler hose on. The damn t-bolt clamp keeps popping off! ![]()
Must be too much horseypower! ![]()
Pics!
Image resized to 78% of its original size [1016 x 572]
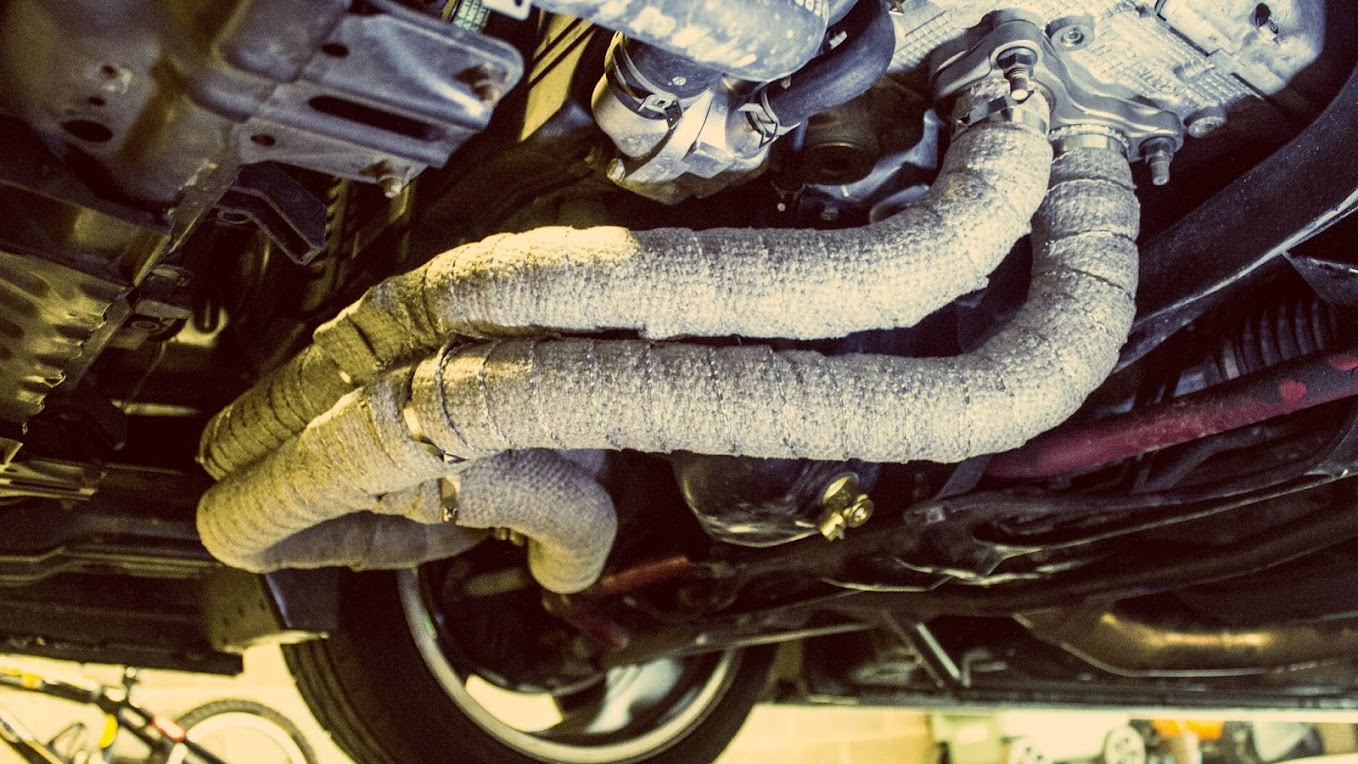
Image resized to 78% of its original size [1016 x 572]
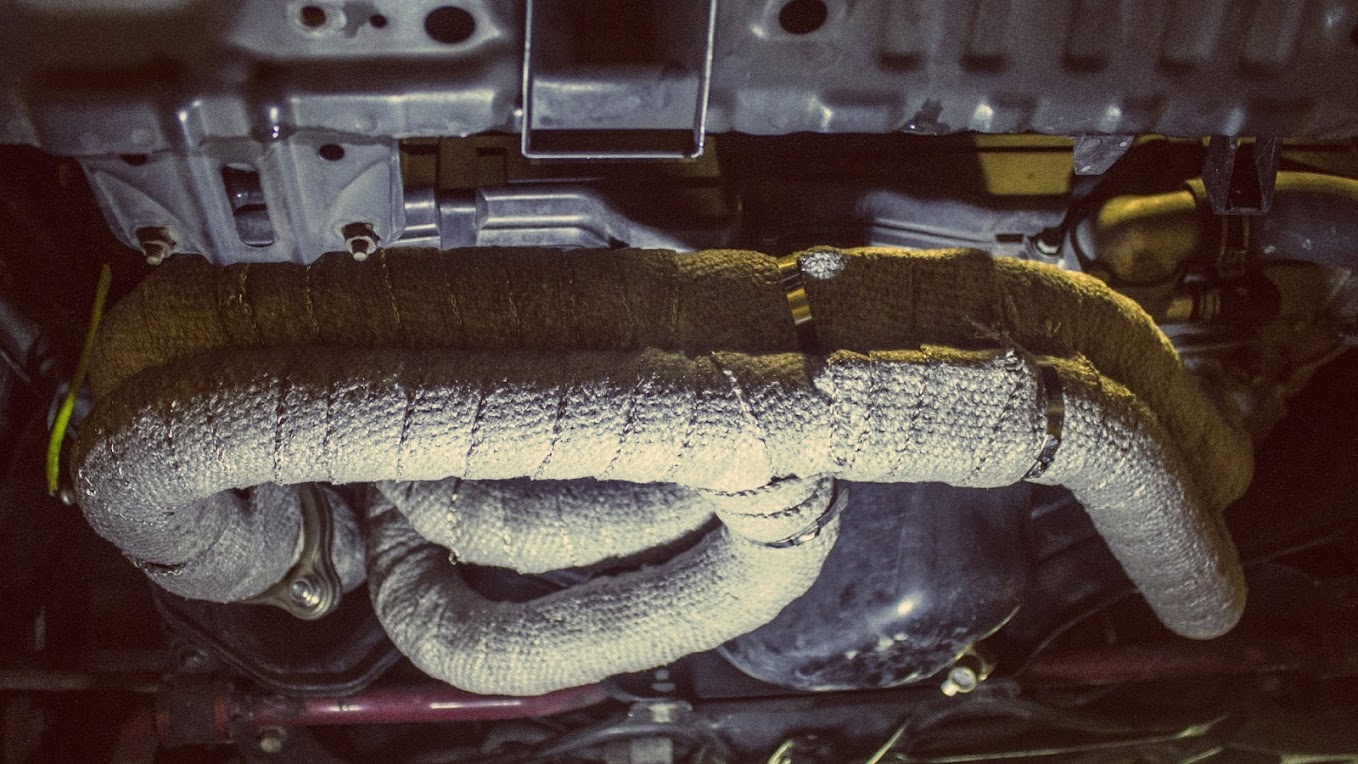
Yeah, I am not a big fan of the Tomei wrap. I have DEI on my downpipe. It didn’t dust up so easily. ![]()
I’ll try to get videos. I need to steal someones GoPro. ![]()
Sound wise, I am a little disappointed. My old setup was damn near perfect though (sans cold idle start). Any deviation would lead to disappointment. Before it was an angry growl. Now it is more like angry hornets. ![]()
Power wise, I love it. Truthfully, I was happy with my power before, and now it is even better. Quicker spool up. Smoother engine. All around power increase all the way to redline. I see 15lbs in first almost as soon as I give it enough pedal. I did my first full 3rd gear pull today. Not seeing 18lbs for some reason, but it is still pulling harder than before. I will send some logs to Eric and let him work his magic.
So far, I am happy with it. I do miss my old sound though. I want to squeeze all the power I can out of this VF52, so an EWG is probably in my future. ![]()
PWR>Sound ![]() <— that’s what I keep telling myself.
<— that’s what I keep telling myself.
Alright, got a new map from Eric and this thing pulls like gangbusters all the way to redline! Some of my stock manifold growl is back too. I am a happy camper! My clutch on the other hand, she is not. ![]()
Took this yesterday while waiting on the wife to come home. Didn’t expect much as I was playing around with full manual mode but it turned out pretty good. All filtering done in Camera Raw. Text done with pixlr.
Image resized to 78% of its original size [1016 x 572]

I installed my 80a DIY transmission mount today. The improved throttle response is welcome! NVH increased too! ![]() Not sure if some of it is from the broken kartboy hanger I replaced, but everything definitely feels better. I’m not complaining.
Not sure if some of it is from the broken kartboy hanger I replaced, but everything definitely feels better. I’m not complaining.
Image resized to 78% of its original size [1016 x 813]

Hopefully this one will hold up better than the others. ![]()
Fixed my exhaust situation (thanks for the XL hanger Russell!) and decided made an exhaust video. My favorite part is Quentin at the end. ![]()
![]() Watch on youtube.com
Watch on youtube.com
For those who didn’t make it to the meet. ![]()
Image resized to 81% of its original size [982 x 982]

I also picked these up yesterday. 17×8 5×114. I think the wife may have claimed them though. ![]()
![]()
Image resized to 78% of its original size [1016 x 726]
I finally dood the headlight upgrades, mad JDM style. H9s and yellow high beams. The H9s are a very welcome improvement, and the high beams light shit up with yellow stuff. I really like the high beams. They light up the road without being too harsh, making it easier to transition back to low beams… at least for me. lol. Oh, and they look sweet just chilling. ![]()


http://designedbyethr.com/blog/2013/9/2 … light-mods
SubieEngineer wrote:
Nice! So what exactly is the H9 upgrade…? Did you simply get better quality bulbs…?
Sent from my Galaxy Nexus using Tapatalk 2
From what I’ve read, the H9s put out more light while sacrificing longevity.
Here’s some reading from another forum post.
http://www.mainelysubarus.com/forums/to … /?p=225004
Easy and inexpensive light bulb upgrade for better lumens output. 1st Mod I did on my car
(Halogen upgrade. Non-hid).
This is a conversation I had with Daniel Stern from Stern lightning (http://www.danielste…g.com/home.html)
GR low beams take a 1350-lumen H11 bulb. You can easily, safely, and effectively replace this with a 2100-lumen H9 bulb, which you ought to be able to find locally by seeking the high beam bulb for a 2008 Chevrolet Malibu. Use a good brand (GE, Philips, Osram-Sylvania) and stick to colorless clear bulbs, not any kind of “whiter light” bulb such as the Sylvania Silver Star scam. Can also get from Amazon, http://www.amazon.com/dp/B00480KOP4 .You may need to shave a small ridge of plastic off the H9 bulb’s connector so that the H11 socket will snap on. Other than that, it’s a direct swap. The only disadvantage is shorter low beam bulb life — the H11 is optimized for very long life with relatively modest light output, while the H9 is optimized for very high output with relatively short life. Note that the H9 swap is not universal; it works well in projector-type low beams but is not safe in most reflector-type low beams or in fog lamps of any type.
If you want to upgrade the high beams, go to your local Chevrolet dealer (or http://www.gmpartsdirect.com for a better price)and pick up two part number 15094219. Can also get from Amazon, http://www.amazon.com/dp/B00480J5CW . That is a Philips 9011 bulb. They are not some tinted or over wattage version of 9005, but share the identical filament geometry and base architecture as well as the same power consumption.
Here’s the comparison:
stock: 9005, 12.8V, 65W, 1700 lumens, 320 hours
new: 9011, 12.8V, 65W, 2530 lumens, 320 hours
The 9011 bulbs have a double-wide top ear on the plastic bulb base, this is to comply with the law requiring different bulbs to have different bases. The extra-wide plastic top ear is easily trimmed or filed to make the bulb fit your headlamp’s bulb receptacle. Once that’s done, they go directly into the headlamp, and the existing sockets snap on. Please see http://dastern.torqu…ods/HIRmod.html for details.
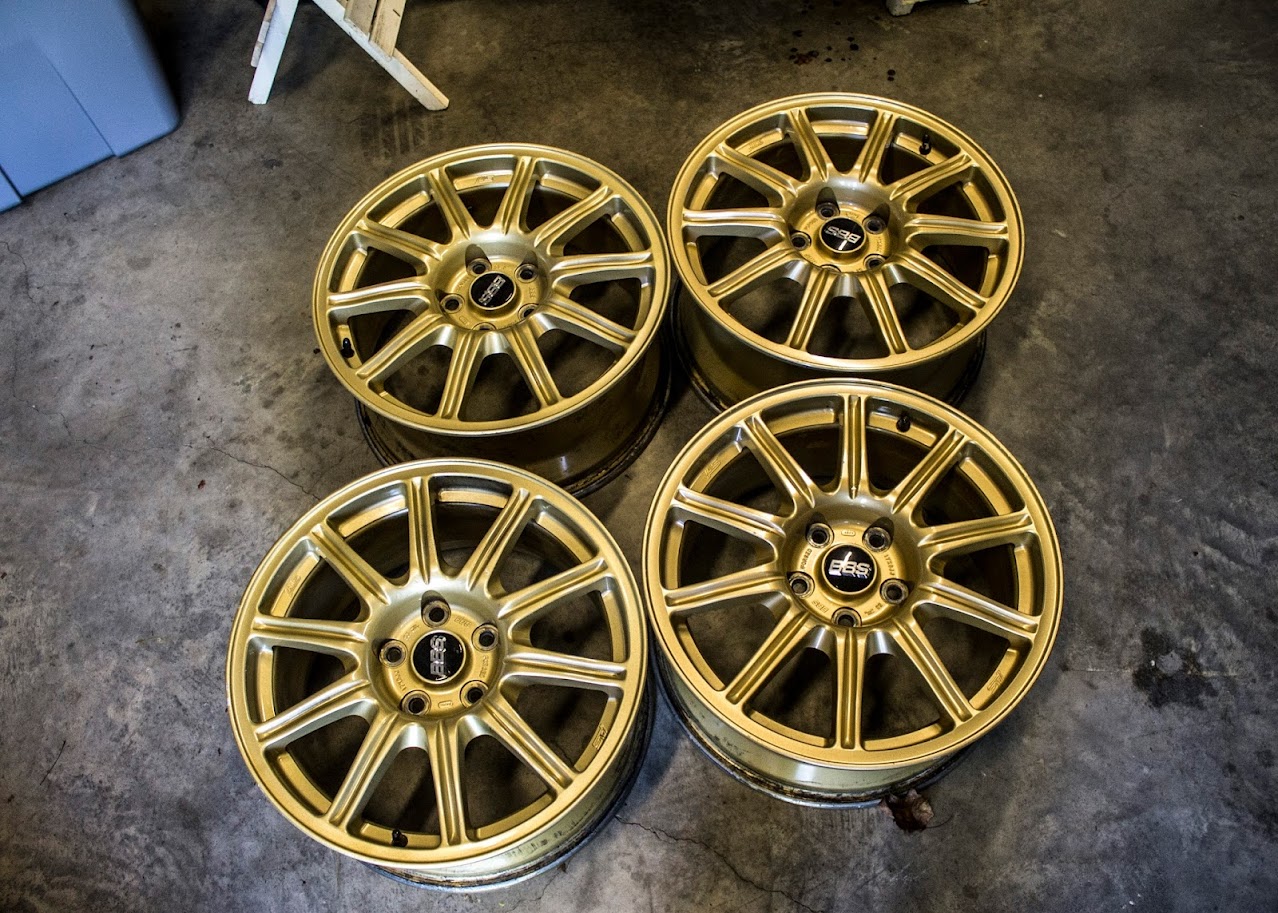
Mounted my BBS wheels for a quick second. Do not like. ![]()
Image resized to 78% of its original size [1016 x 572]

Welp, my house is turning into a money pit so I am settling for what I have for now to keep the woman happy. However, I am not happy with the DWS tires (not a bad tire, just not what I want) so I will probably get a set of 245/40 summers and call it good.
Anyhoo, here’s a pic.
Image resized to 78% of its original size [1016 x 572]
Somehow, I thought this would get less attention than my giant red wheels. lol. I was wrong. ![]()
Some of you know my punk ass air pump tried to catch a fire on me right before I left town for Xmas.
Image resized to 80% of its original size [1000 x 750]

Image resized to 80% of its original size [1000 x 750]
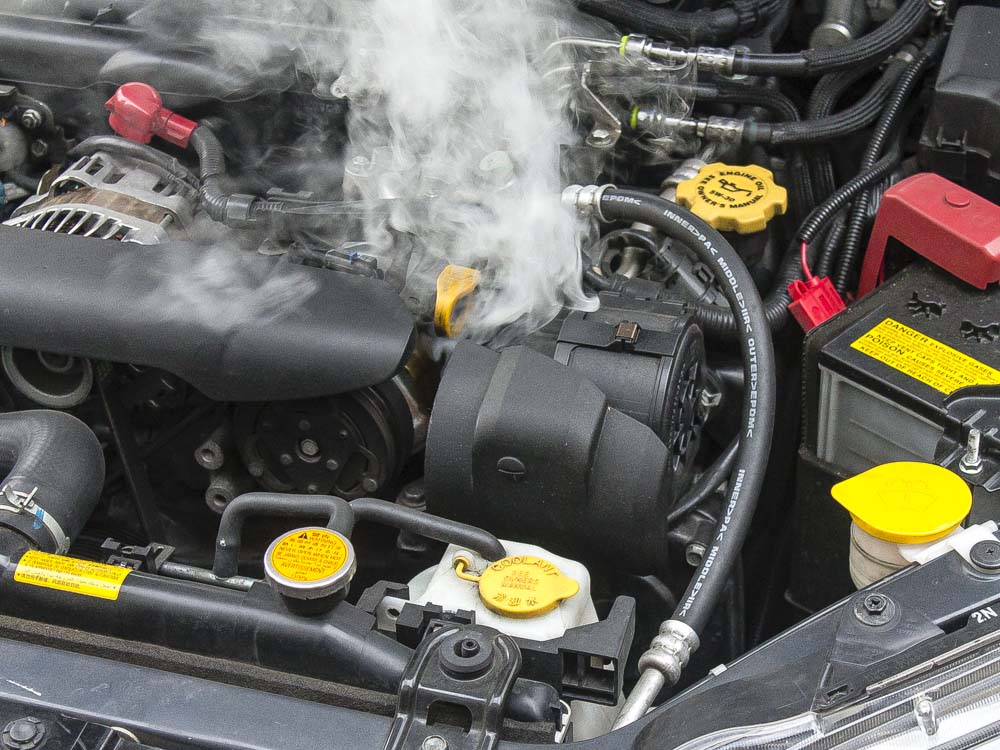
Image resized to 80% of its original size [1000 x 750]

I thought about replacing it as I am still planning on selling the car down the road. Then I saw the prices…. hells no! So I ordered a delete kit from Subieworks. It should be here soon. In the meantime I emailed Eric and he send me a new map to kill the codes same day, on Xmas Eve. ![]() Car fired right up and runs like a champ. It still reeks of burned plastics though, even though I left all the windows open for a week.
Car fired right up and runs like a champ. It still reeks of burned plastics though, even though I left all the windows open for a week. ![]()
But before that, Zach let me test fit his wheels again. I completely expected it to be rub city on the test drive. It wasn’t. I expected the wife to flip out over the price, she didn’t. I couldn’t help myself… My favorite wheels sitting right in front of me, I bought them. So weak. ![]()
Image resized to 78% of its original size [1016 x 572]
The plan was to dip them orange (for protection of course) until I located a set of stockers… that somehow happened today. ![]()
So I guess I will keep them until the suspension comes off. ![]()
This is what I have on tap.
Image resized to 78% of its original size [1016 x 572]

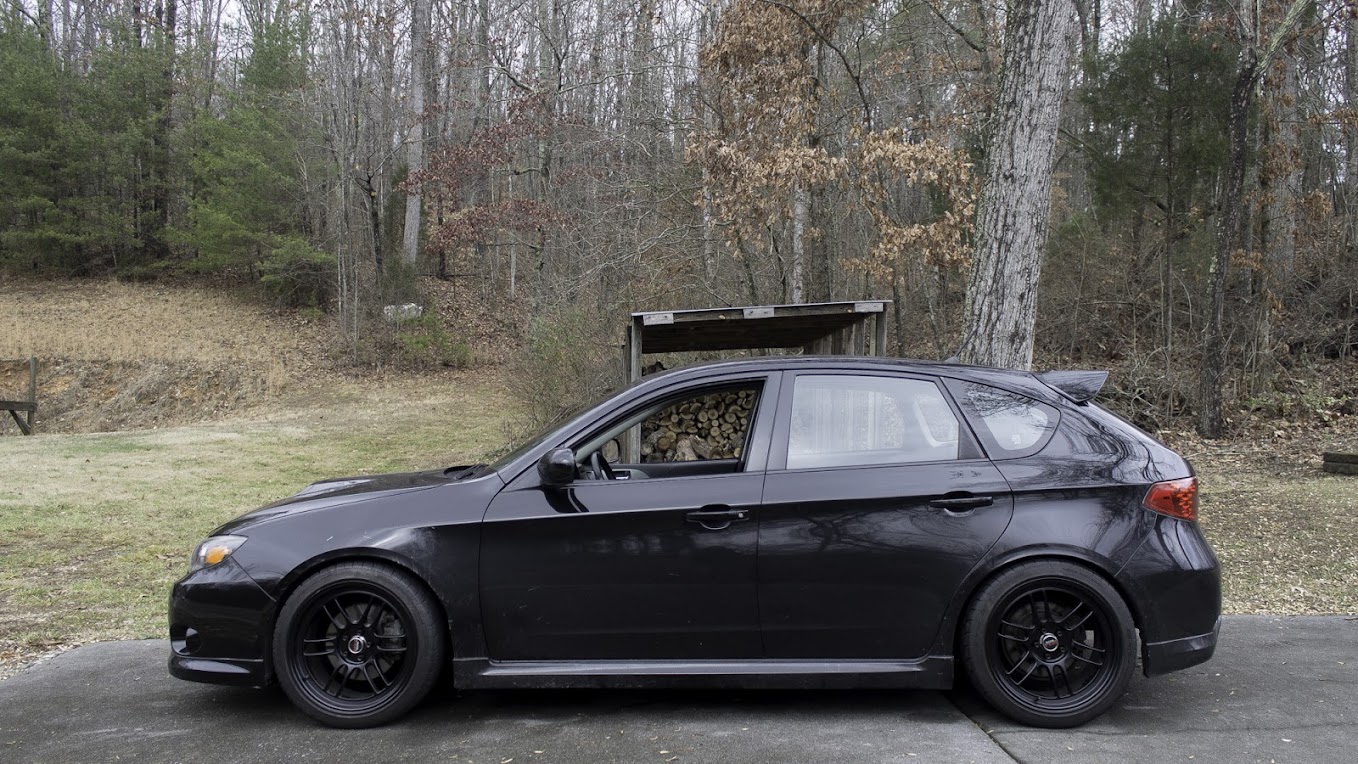
Welp, it looks like I’ve finally reached the end of the line with this car. It’s time to move on to something else.
How she looked this morning.
Image resized to 81% of its original size [983 x 553]

How she looks now.
Image resized to 81% of its original size [983 x 553]

Ehhh… I completely forgot how long this took this first time. ![]()
My babies! ![]()
Image resized to 81% of its original size [983 x 553]

For the most part the suspension is back on. I just need to remove the roll-center kit and the h-brace and tighten up some bolts. Then it is on to the engine to remove the crank pulley, pitch mount, downpipe, headers, up-pipe, and install OEM range spark plugs. Cake, right? ![]()

Leave a comment