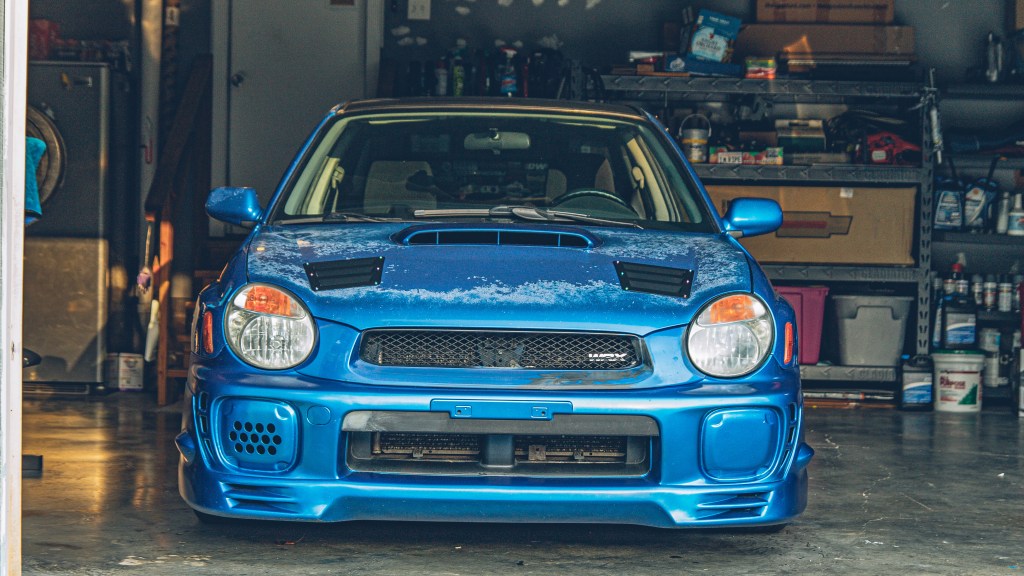
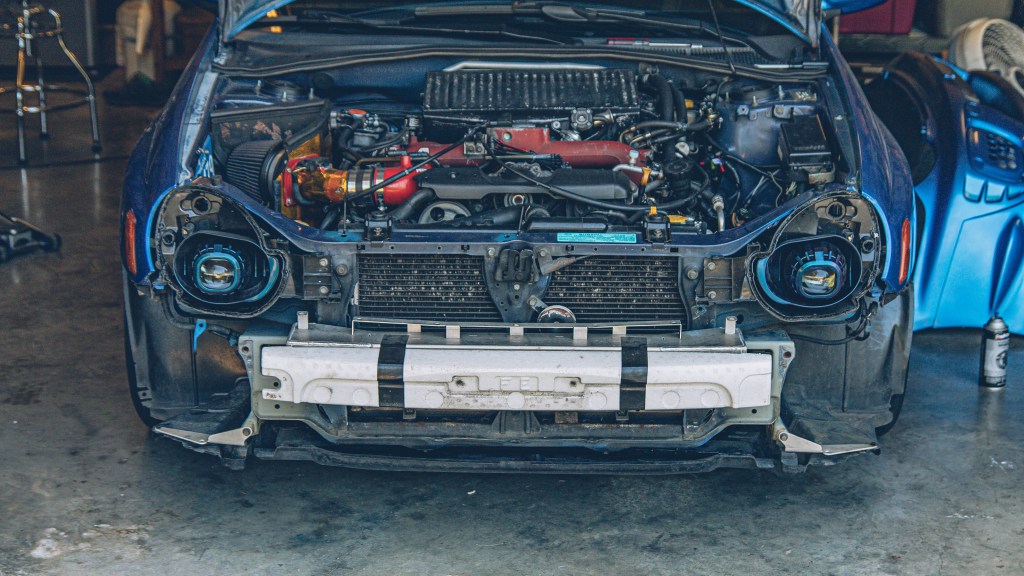
With shorter days ahead, and a potential part-time job lined up in which I would be working evenings, I decided it was time to upgrade my Bugeye WRX halogen headlights.
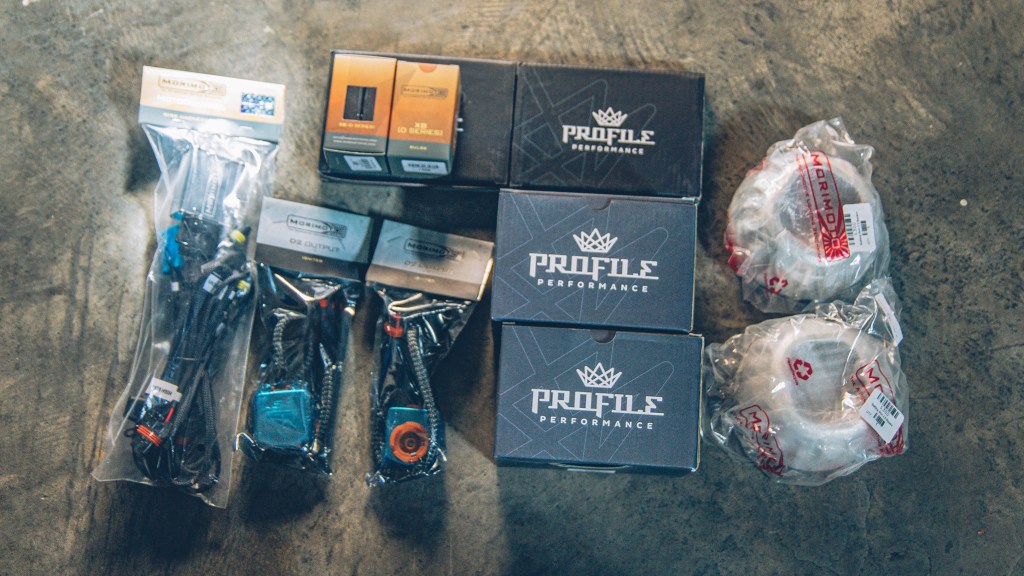
I picked up the Bi-Xenon Profile Bi-Lens D2S Stage III kit from The Retrofit Source. My main interest was the square lens and the reasonable price.
My stock headlights are horrible; so much so that I just avoid driving at night. In a well-lit city, they would probably be fine, however, I live in rural-ish East Tennessee. Many of our roads have no lighting at all.
This post isn’t really a step-by-step how to, there is a pretty good DIY thread on Nasioc, as I was limited on time and I really needed to get this done. This is more of a documentation of my progress while noting a few tips or tricks along the way.
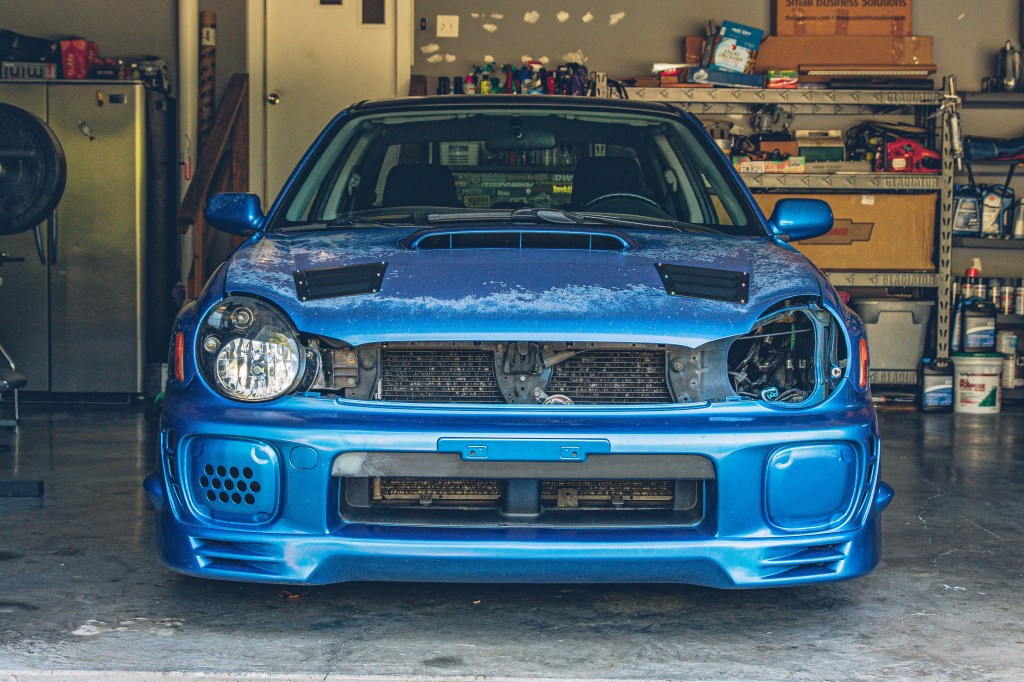
First step is so remove the headlights.
The short end of it is to remove the grill and the two side pieces if you still have the stock grill; disconnect the wiring harnesses and then remove the three bolts holding the headlight in place.
You will need to wrassle the headlight out of the ball and socket near the fender.
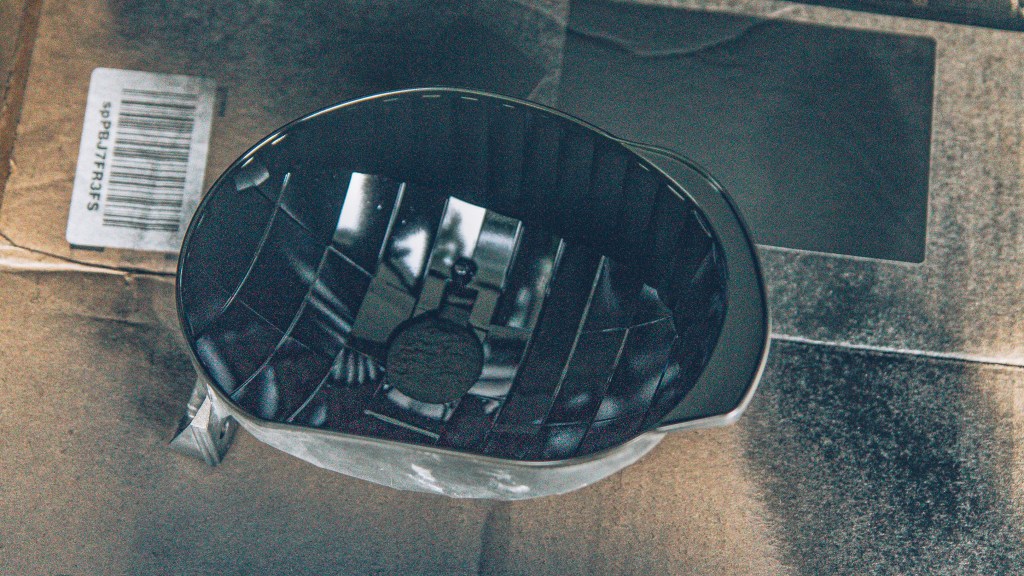
I reinstalled a spare modified headlight I had laying around for inspiration.
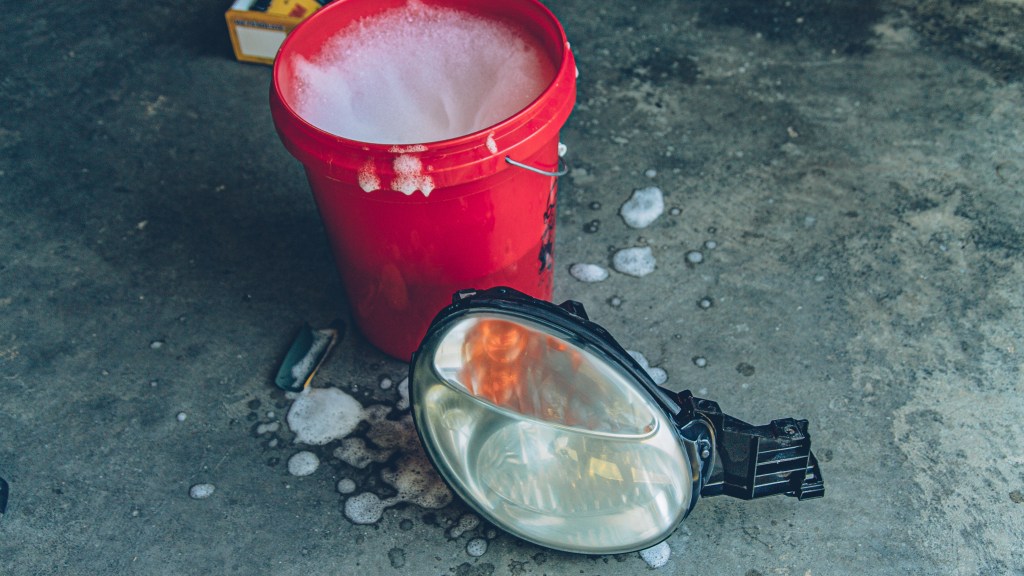
Next, it was time to… wash the headlights.
I had a failed clearcoat incident awhile back so I needed to sand off all of the old clear before I could polish them up. I basically tried to speed up the curing process of the clear coat by using a heater. I placed it too close to the headlight and the clear coat cracked immediately.
I just used some Dawn liquid soap to wet-sand and to clean them off before sticking them in the oven.
While I was wet sanding, I preheated the oven to 225°F. Once I was done sanding I put the headlights in the oven for ~7-8 mins.
I initially put both headlights in at the same time but it took me a little too long to separate the lenses from the housings so I had to reheat the second set.
Definitely have a screwdriver or trim removal tool on hand to knock down the strings of sealant as you separate the lenses.
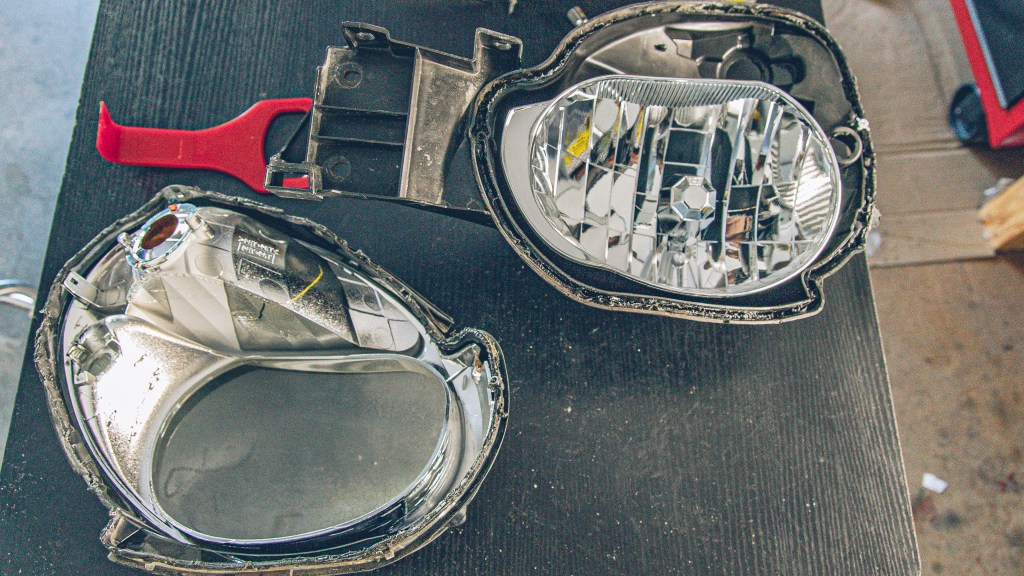

There are a couple of screws that hold the bezel to the lens and they some come free.
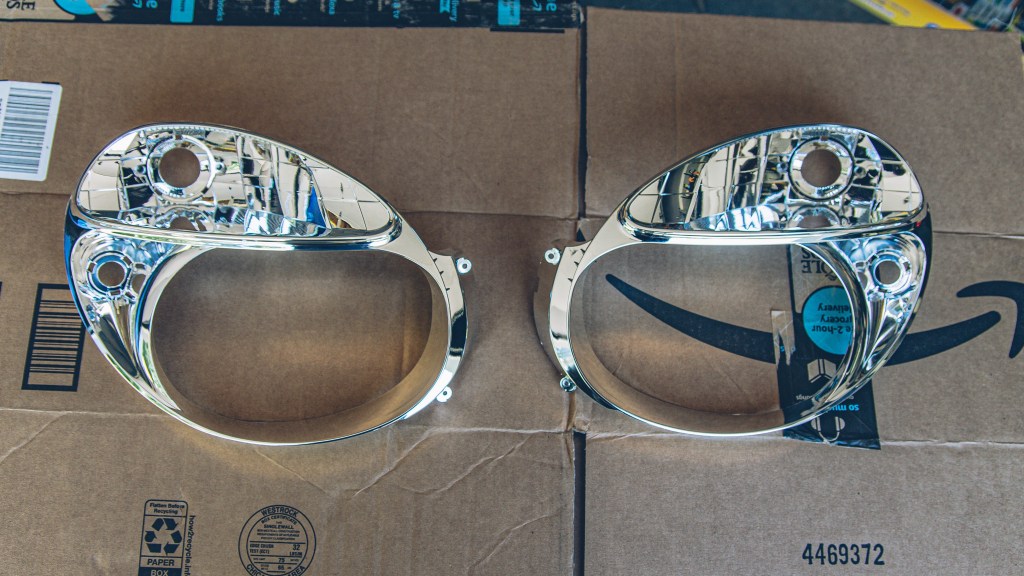
It is here where I would do things differently. I didn’t prime the bezels, nor the reflector bowls or the projector shrouds when I painted them. I had primer on hand, but in the interest of time, I decided to skip that step.
I had a small window of opportunity to get this done in between studying for class and before I start a new job.
I used a bunch of light coats before going with a medium coat.
Next up, we need to modify the reflector bowls to accept the projectors.

The mounting point/surface for the 9004 headlight needs to be cut down and opened up so the threaded part of the projectors can fit. This is obviously a point of no return.
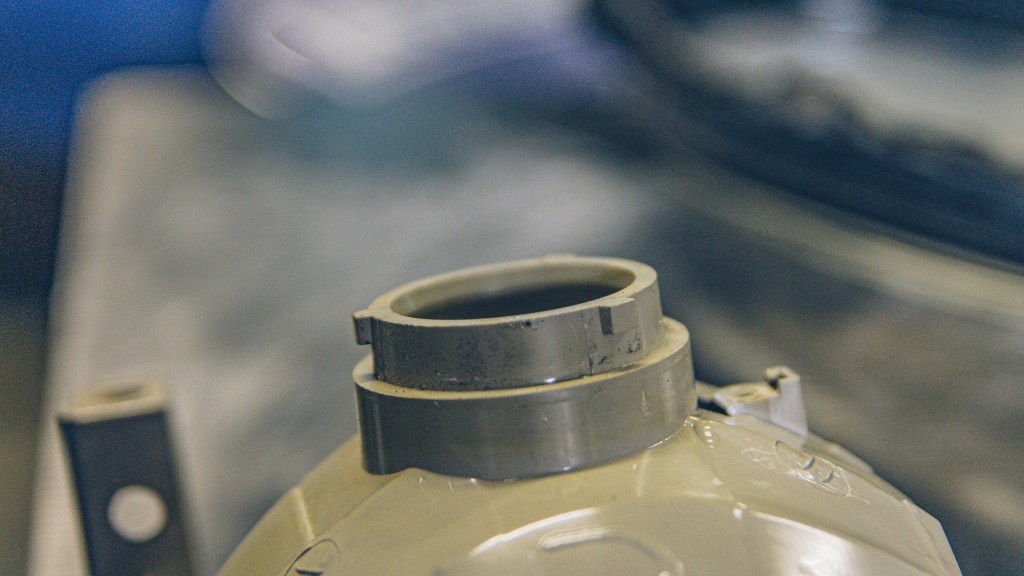
I used an Oscillating Multi-Tool to cut the mounting surface down and a half-round file to open up the opening. I then used a sander to smooth out the rough edges.

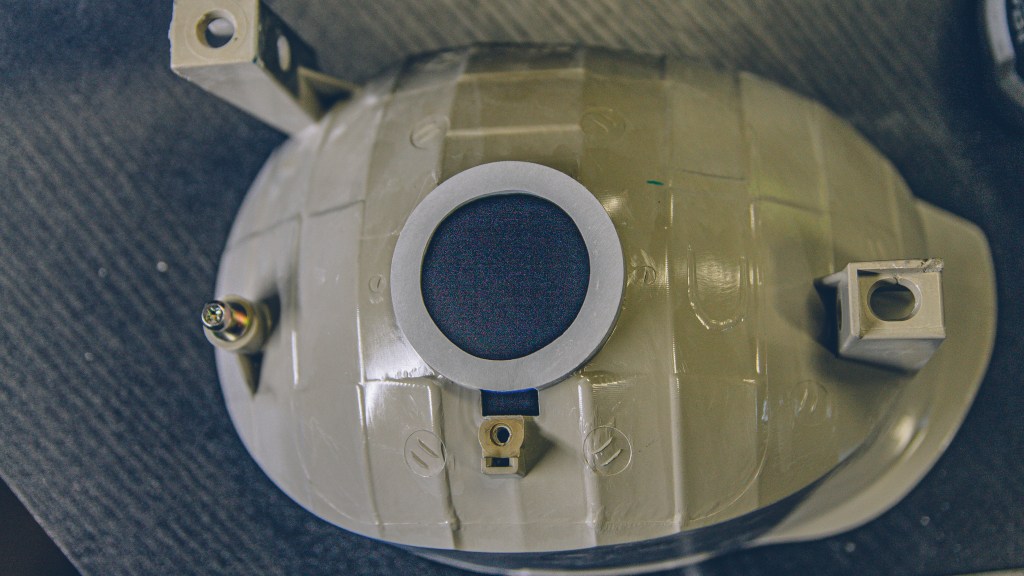
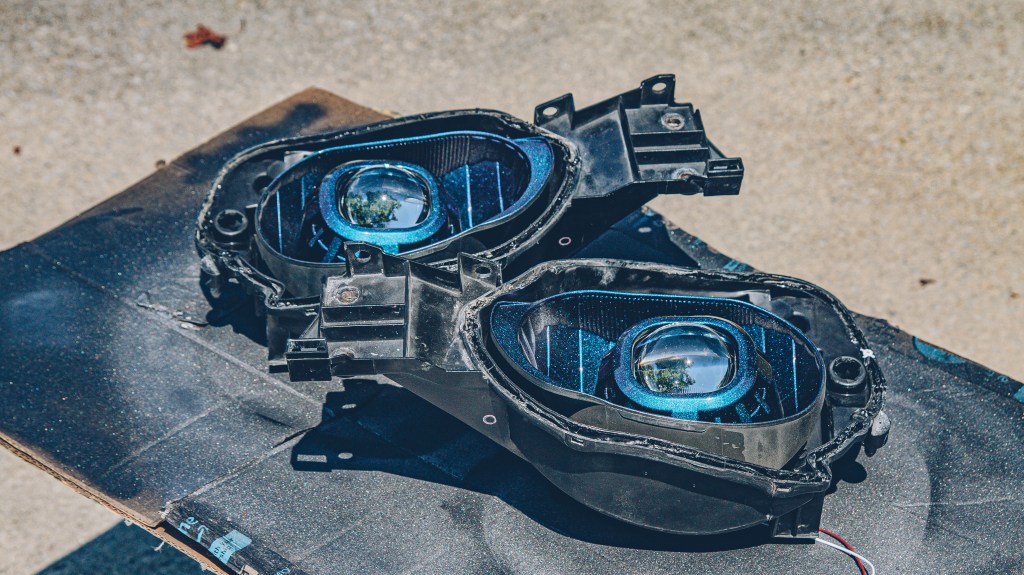
After some some test fits and more filing, the projector finally fits.

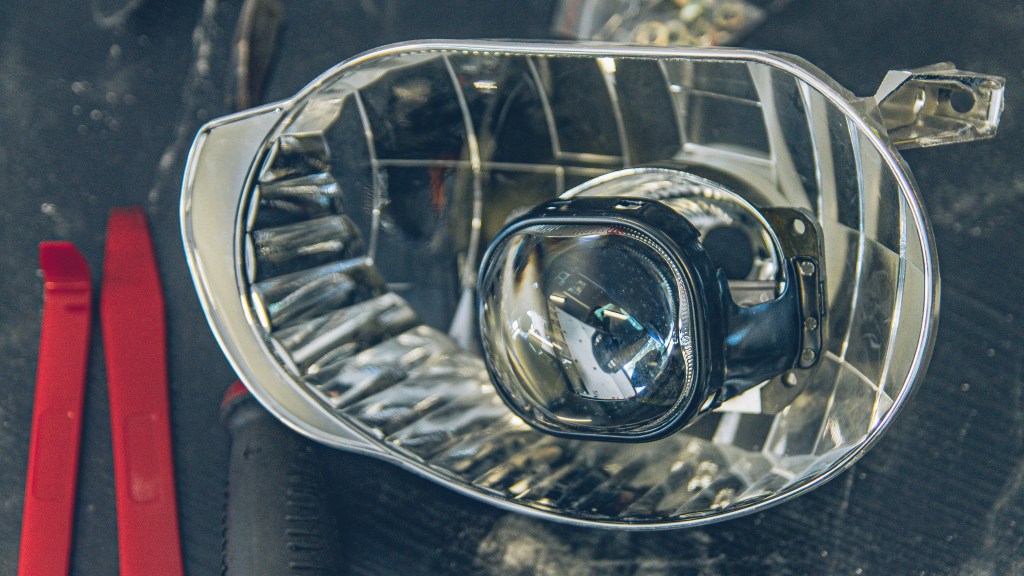
Next up, trimming the shroud.
The Gatling Gun 2.0 shrouds are really big, so much so that they don’t fit the projector in the reflector bowl without trimming. Luckily, all of the trimming needed is on the bottom and out of sight.


The shroud has little clips to attach it to the projector, but they aren’t strong enough to keep it in place. I eventually used epoxy to hold the shroud to the projector.
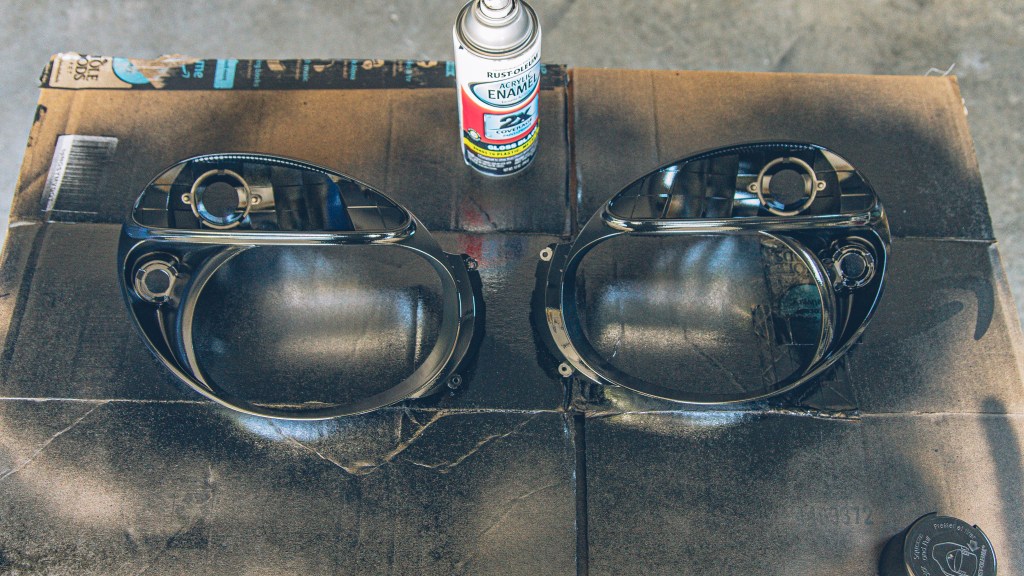
Before that happens, its time for paint.
I originally wanted to paint the reflector bowls yellow for a French headlight look. But not one really sells the stainglass or metallic yellow paint locally and the shrouds are much bigger than I anticipated. I don’t think it would have looked as good as I was imagining.
So, I decided to try something else.
However, first, I needed to change the color of the bezels. I wasn’t digging the black. I tried the graphite paint that I used on my calipers awhile back and I liked the results. It actually came out with a bit of a textured feel for some reason, but I like it.


At the same time, I was painting the reflector bowls and projector shrouds as well. I had to start with the black basecoat.

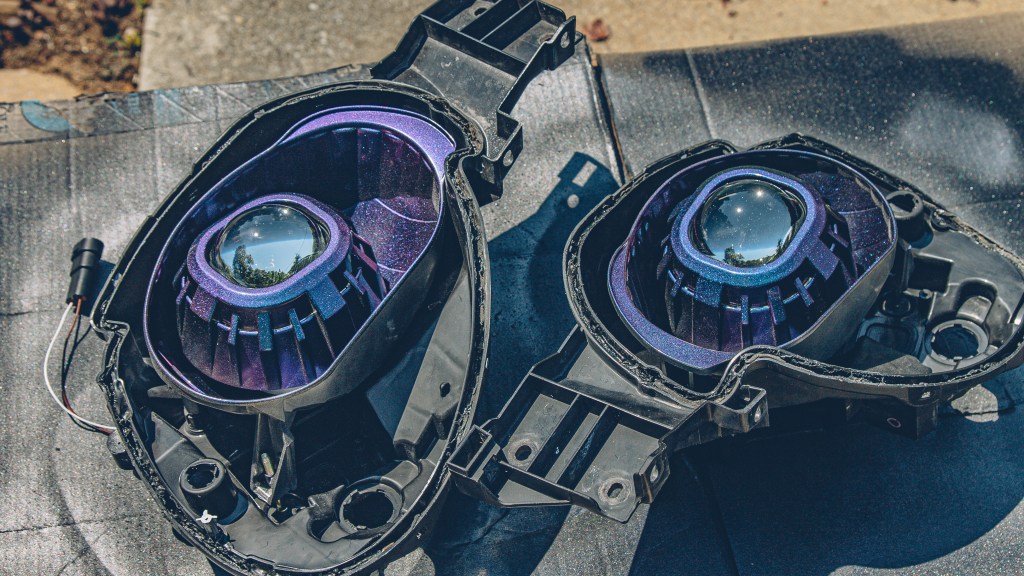
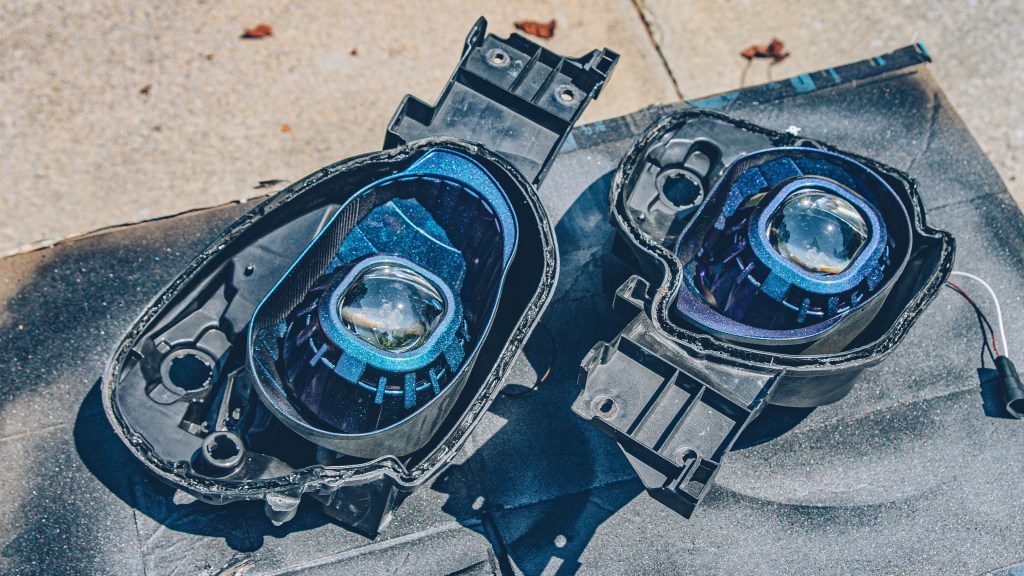
…and then the colorshift top coat.
The color-shift effect isn’t as dramatic as I hoped, I probably should have used a glossier black (along with more top coats), but it looks good enough for now. I really like the contrast with the graphic bezels.


I did a test fit of the amber turn signal. I left them off for now, but I plan on smoking them and putting them back in. I think the headlights look a bit incomplete without turn signal lens covers.
I did another loose test fit to see how things were looking before disassembling everything for the final time.
I set the headlights out in the sun to help bake them.


In the meantime, I worked on the wiring and sanding the lenses. I waited until after reassembly to do the final wet sand and polish, just in case I scratched the lenses again.
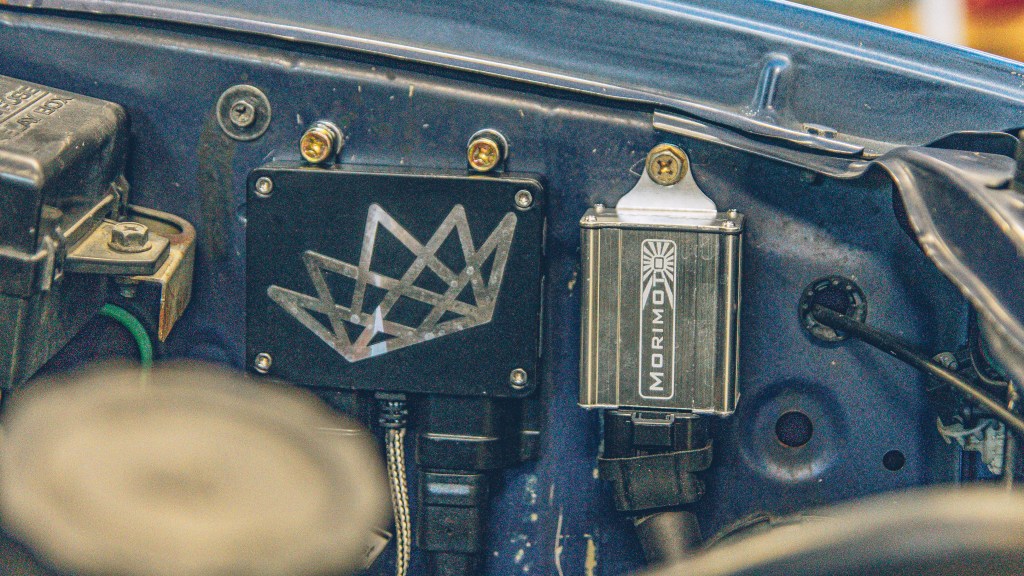
Everything is labeled in the kit so it’s pretty straightforward. You just need to figure out where to mount everything. The Morimoto relay unit needs to be mounted vertically.

You will need to bake the headlights again to soften up the sealant. Setting them out in the sun may have worked too. However, this is when you two reassemble the two halves – the bezel goes back onto the lens and the projector/reflector bowl can be installed into the housing.
At this point, I would recommend firing up the headlights and making any rotational adjustments to the projectors.
Reattaching the lens to the housing is a bit of a game of hot potato. You need to squeeze two very hot items together without burning your hands. I used some old winter gloves until they broke apart.
Once the
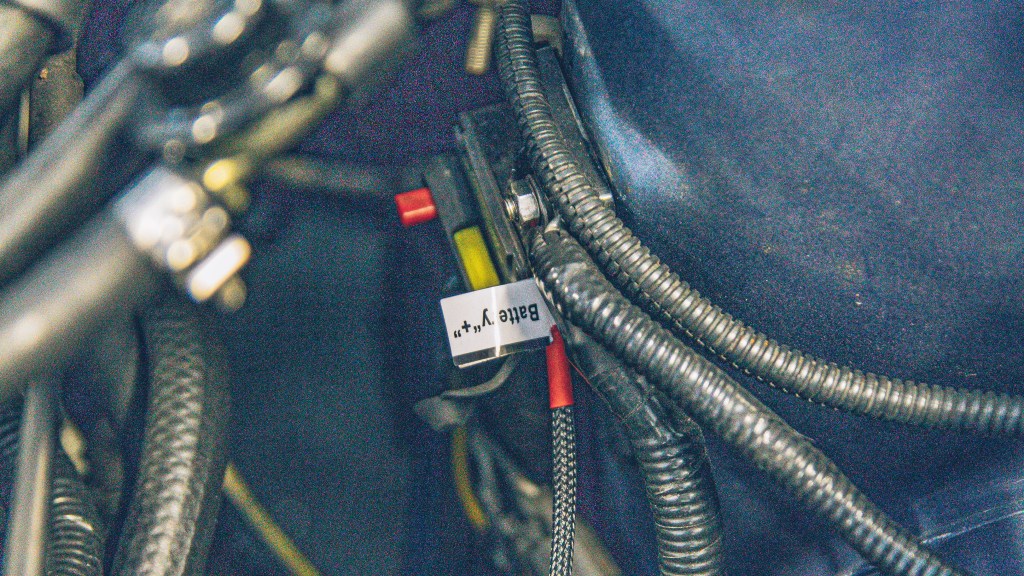
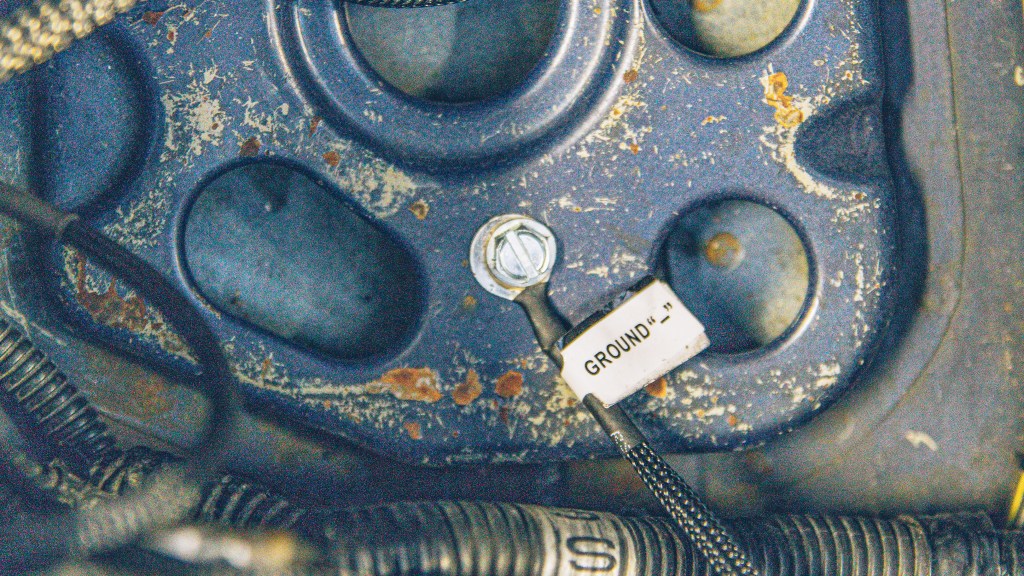
I had a couple issues with the wiring. First, only one headlight would turn on.

Second, my headlights were reversed. The high beams were on in the low beam setting and low beams in the high beam setting.
The first issue turned out to be a ground issue. The driver’s side ballast was very picky about the ground. I ended up drilling a tapping a new spot in the engine bay to get it to work. The crimp on the ground wire was loose; tightening the crimp fixed the problem.
The second issue is the 9004/9007 wiring harness. And this is a common issue with these retrofits and almost everyone seems to have a different fix.
However, this is what worked for me.


If your lights are reversed (high beams on in the low setting, try swapping the outer wires first. Also, if your high beam indicator is on, disable the DRL system.
With the wiring solved, it was time to clean up the lenses.
At first, I went with the 3M Headlight Renewal, which worked ok. There was still some haziness to the lenses.


I then tried some regular old 3M compound I had laying around. It seemed like the exact same stuff as the 3M Headlight Renewal but it worked much better. Next, I used some Meguiars polish and they cleaned up even more! I couldn’t believe it. These headlights have never been this clear. I threw some wax on them for good measure.

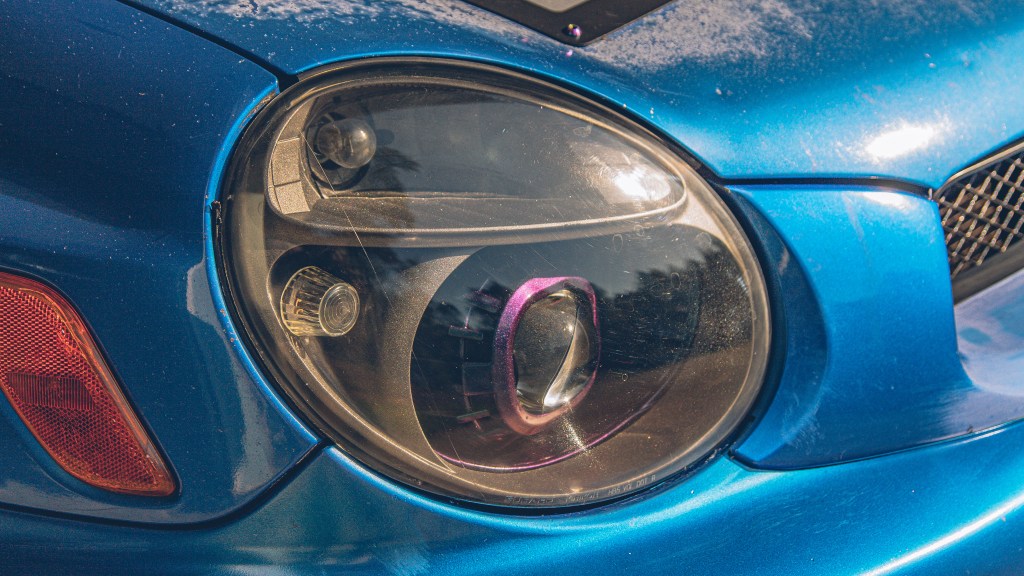


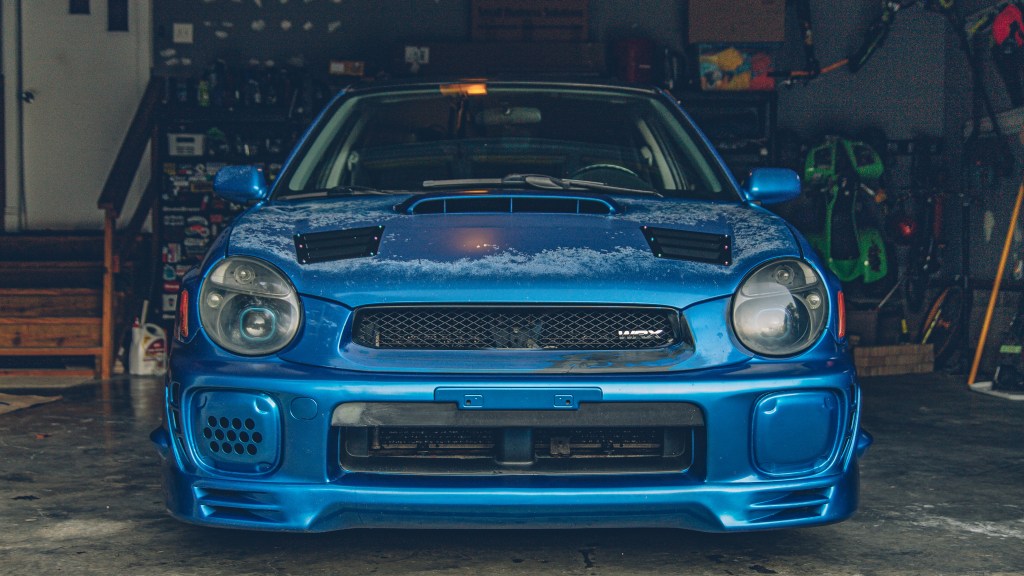
Now that the headlight lenses are so clean and shiny, it is really hard to get a good pic of them. I probably need to invest in a polarizer.
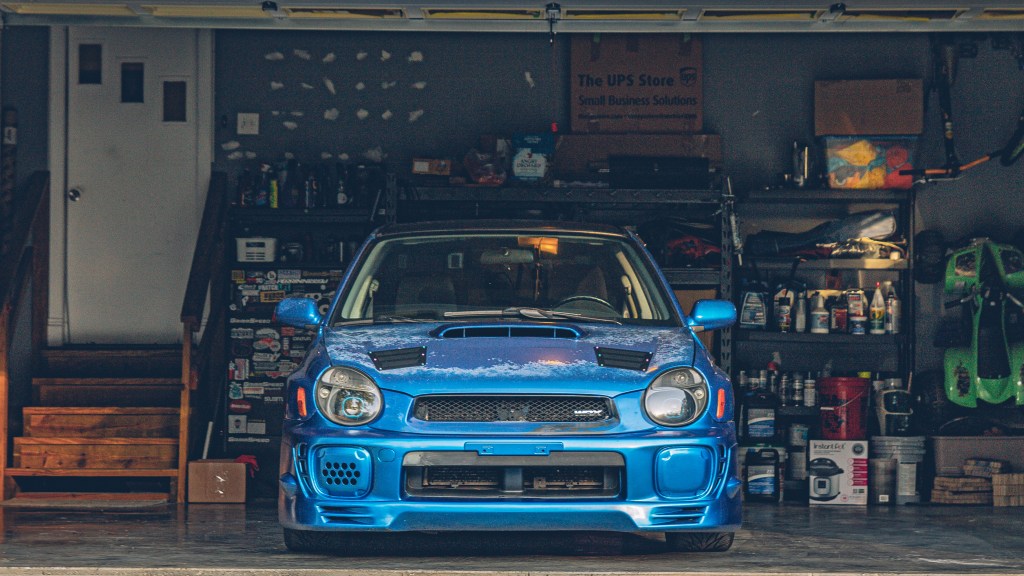
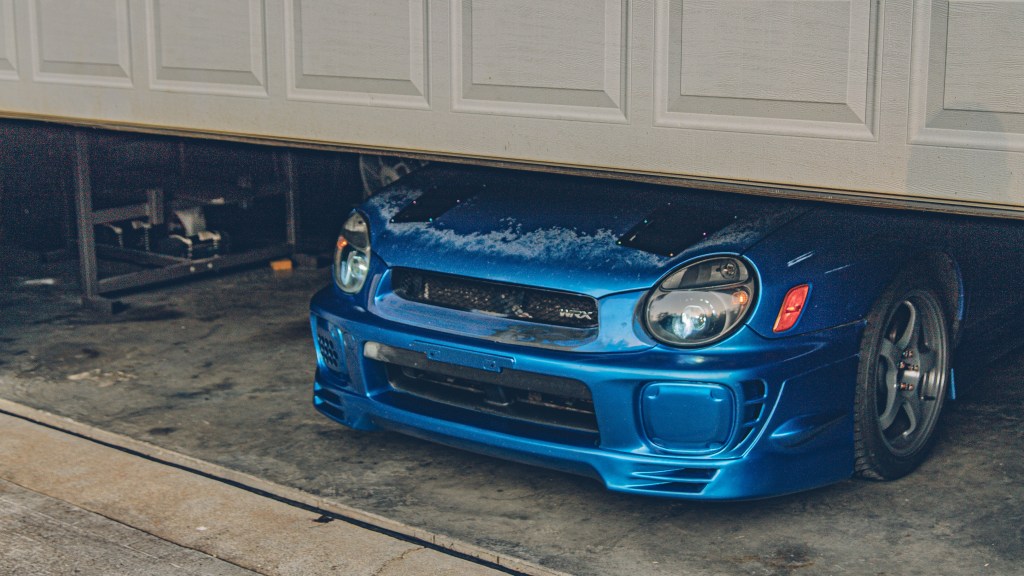


I don’t have any performance shots yet. My camera really struggles with night photography; it’s really a crapshoot as to whether they come out well. And I am still dialing in the headlight alignment. But hopefully, I will be able to get some soon.
Cheers!

Leave a comment