
Just over a hundred years ago, you know, way back in 2018, I disabled my ABS by pulling the fuse. It is a quick and easy way to see if you can live without ABS. Since my car was down for the clutch job turned partial transmission rebuild, I decided to fully delete the ABS system as well. There are a couple of write-ups out there, although most are for the GC-chassis. There are a couple of options for you to consider.
How OEM do you want to be?
Some cars came without ABS, however, sourcing master cylinders and proportioning valves from a non-ABS, 4-wheel disc brake car is becoming more difficult to find parts for; some of those options are from rare JDM cars.
I prefer OEM parts where ever possible, but since those parts are incredibly difficult to come by (even in aftermarket form), and may not suit my needs anyway, I decided to start from scratch.
Another thing to keep in mind is the brake split. Subaru’s have a diagonal brake split, which most people consider to be safer in the event of a failure. In the diagonal split, the FL/RR wheels share a port and the FR/RL wheels share a port on the master cylinder. The other method is the front/rear split. To keep the diagonal split, you may need two adjustable proportioning valves or an OEM non-ABS setup.
I will be switching to front/rear split for simplicity and for my long-term plans.
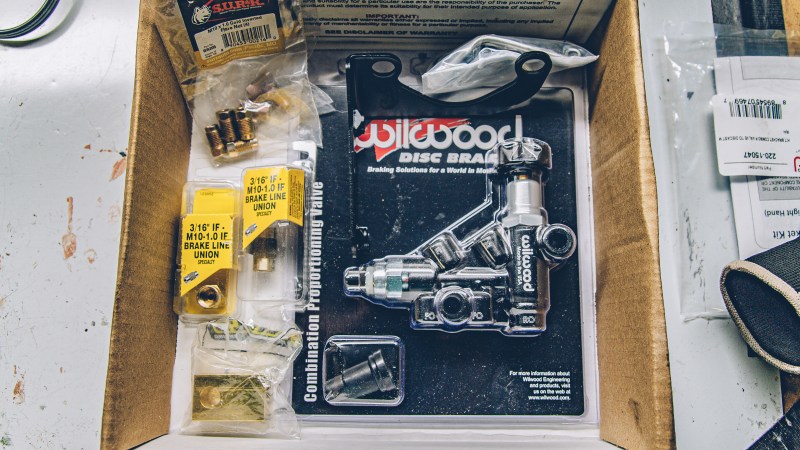
Parts List
Here is my parts list. The number at type of fitting you will need will very much depend on what setup you go with.
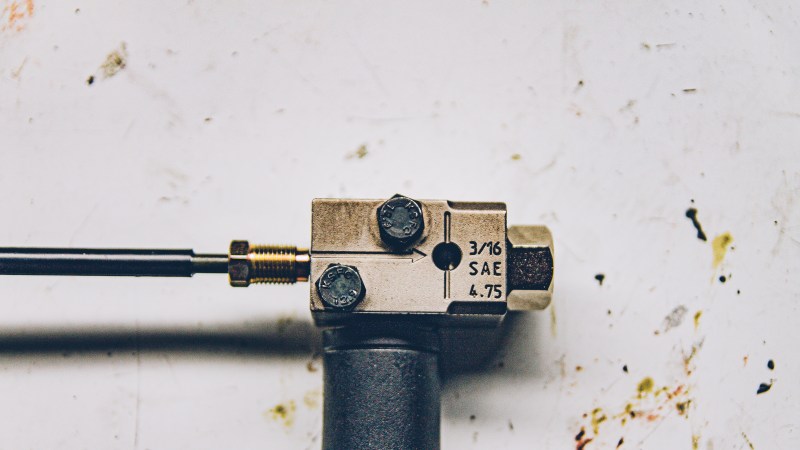
- Wilwood Adjustable Proportioning Valve
- Wilwood Bracket Kit (comes with (4) 3/8-24 fittings)
- M10x1.0 Brake Line Tee
- M10x1.0 Inverted Flare Fittings (x6; also depends on how many you can reuse)
- M10x1.0 Inverted Flare Couplers (x2)
- 3/8-24 Inverted Flare Fitting (x5)
- 1/8-XX Wilwood Bleeder
- 25-feet of 3/16″ Nickel/Copper Brake Line
Tools
- 10mm Flare Nut Wrench (I used two 10mm wrenches)
- Brake Line Flaring Tool
- Brake Line Cutting Tool
- Brake Line Bending Tool

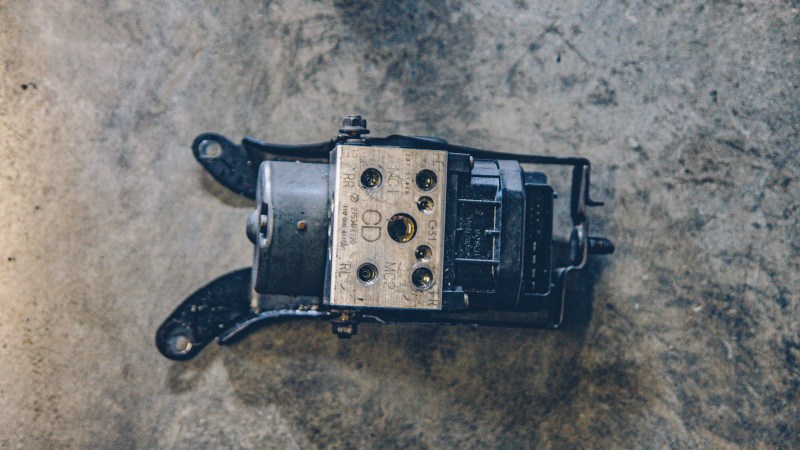
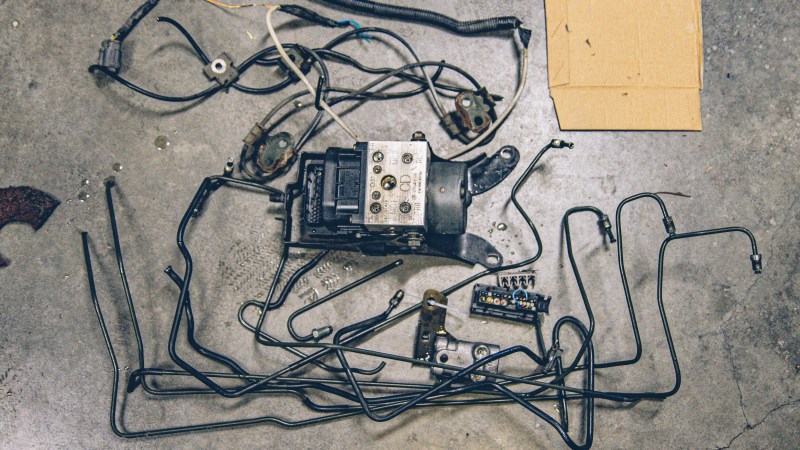
First thing I did was try and crack loose all of the M10x1.0 fittings on the ABS module, the master cylinder, the proportioning valve, and so on. Hit them all with penetrating oil beforehand as some of them were completely seized.
Most of the fitting broke loose, but I had two that were seized on the ABS module. I had to use my largest vice grips, plus an extension and a hammer to break them loose.

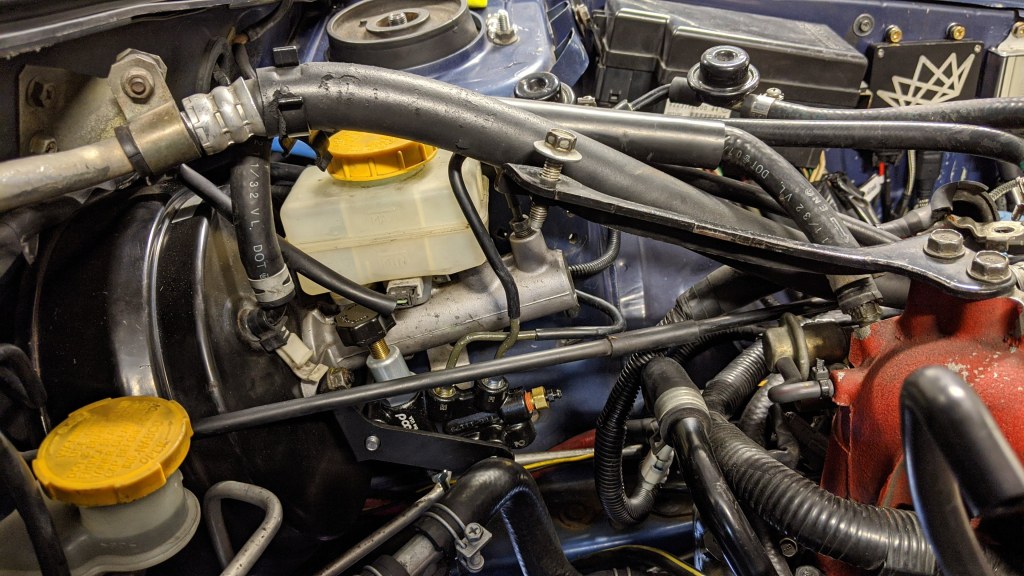
We can also test fit the Wilwood mounting bracket and adjustable proportioning valve. This bracket isn’t designed to fit the Subaru m/c but it fits the bolt pattern. The valve is intended to fit on the right side of the bracket but I wanted it to be tucked away more so I put it on the left side. There is just enough room with the adjustment knob fully extended. The pre-bent lines won’t work so you can just steal the 3/8-24 fittings from them.

For the brake light sensor, I am replacing that with a bleeder valve to help bleed the system and to speed up fluid changes.

Removing or deciding which lines to keep and which to remove is the hardest part. Any of the lines that run along the firewall will have to be cut out in sections unless you plan to strip down your engine bay.

In the photo below, the two lines on the frame rail are running from the m/c to the ABS unit. The other line is running from the ABS unit to the driver’s front brake. I kept two lines, one for the rear brakes (teed at the existing rear lines) and the other one used for the passenger side front brake with a union. I couldn’t quite get the OEM driver front line to work so I made a new line out of nickel-copper.
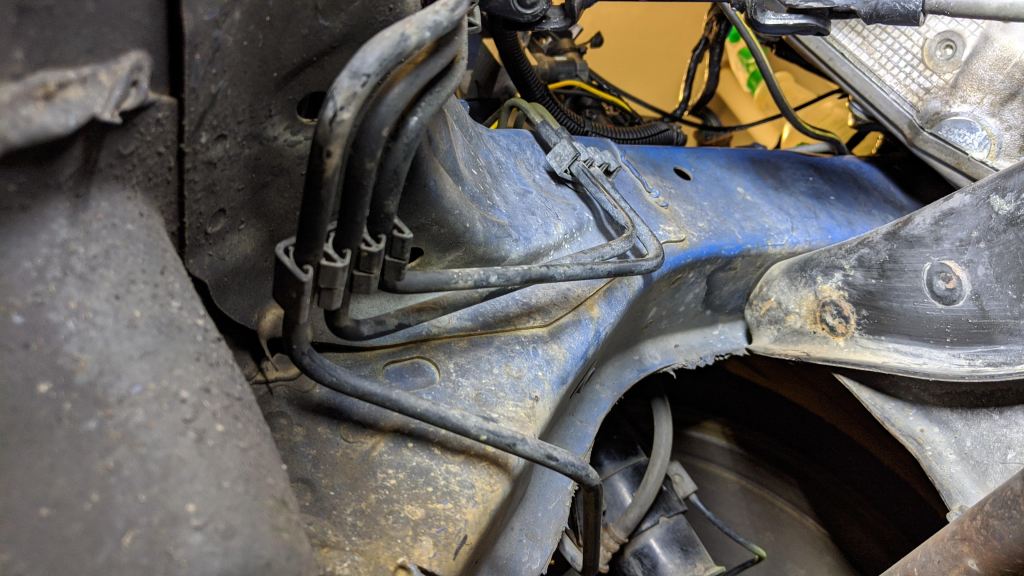
Driver’s Side, below the master cylinder. 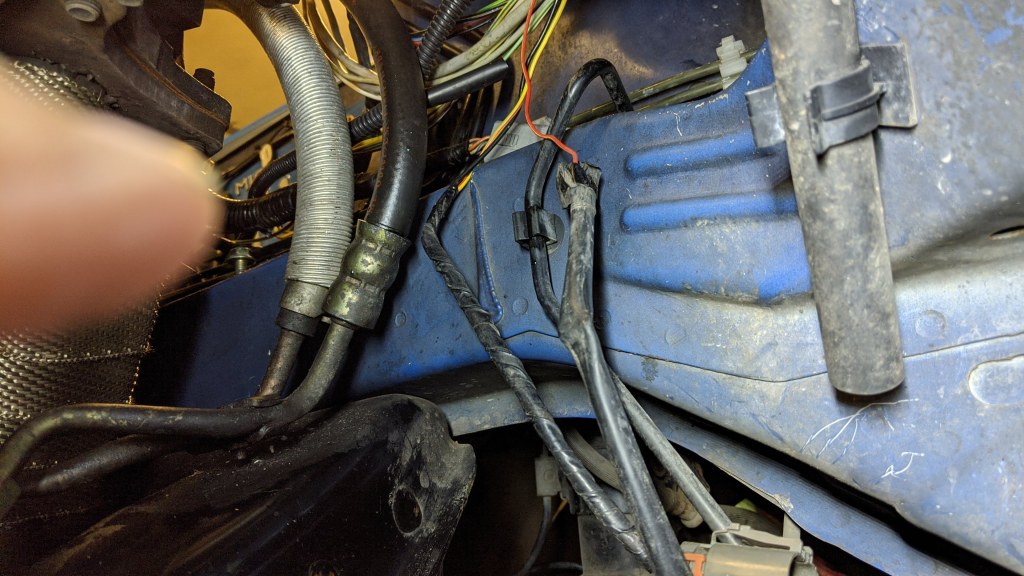
Passenger side frame rail. 
Passenger side frame rail
I also reused as many stock hardlines as possible. Especially those with long straight sections. These work great for either practicing bending, cutting, and flaring lines, as well as mocking up routes for your more expensive stuff.
Pro Tip: Always remember to put the flare fitting on before you flare the brake line.
This flare nut tool from Summit Racing is one of the best that I have used. It sets the depth of the brake line before double flaring it, making the process pretty consistent.

A clean cut on the brake line is very important. This brake line cutter might be over 10 years old but it still works.


The brake flaring tool is pretty easy to use.


Now enjoy your newly invert flared brake line.

The brake bending process for me was more or less trial and error. I took some general measurements to get an idea of how long my brake line run should be; but otherwise, it is just a process of test fitting and guesstimation over and over again.


A block for the rear brake lines 

Initial install using extra OEM brake lines.
Before switching to NiCopp lines.

In the next version, I will probably use more of those banjo adapters for cleaner brake line transitions. I will probably move the adjustable proportioning valve to the other side of the master cylinder to tuck it out of the way more. And I think an STi master cylinder will help firm up the pedal feel as well. Overall, I am pretty happy with the results.
This is very much a winter project or a long weekend project assuming you have all of the right parts. It isn’t difficult, just time-consuming. I had a bunch of failed brake lines because I wanted to make a bend that was super tight and either made the bend too early or too late.
ABS Wiring Delete (Optional)
I pulled the ABS wiring out of the engine bay and for at least part of the dash. The biggest benefit of this is cleaning up the engine bay and reducing the number of wires in the fender and under the dash. Weight-wise, it’s only a couple of pounds tops. I didn’t remove all of the wires behind the dash

That said, the ABS light on the dash goes out completely.
So far, I have been driving around for a few months on this setup and I haven’t really noticed any major changes in day to day driving. I’ve made a few Dragon runs and only when I am driving really hard do I think about the brakes. However, I have yet to lock them up. There might be more feedback in the brake pedal but it’s hard to say. I don’t drive my WRX nearly as often as I used to, so my internal settings are all reset.
As I drive more on this setup, I will report back on my feelings on these modifications.
Cheers!

Leave a comment